Getting Started with Emails
Overview
You can view email history in two locations in WebAdMIT:
- Individually through the Emails panel on the Applicant Details page.
- In bulk through the Search Correspondence feature under the Applicants panel.
Review the Email Status definitions to further understand your email history.
Gaining Access to This Feature
The Emails panel is available on the Applicant Details page and access to it is controlled through Work Groups. You must have the Emails panel enabled for viewing.
The Search Correspondence page is available under the Applicants panel and access to this tool is controlled through Work Groups. You must have the Email Applicants permission to access the Search Correspondence page.
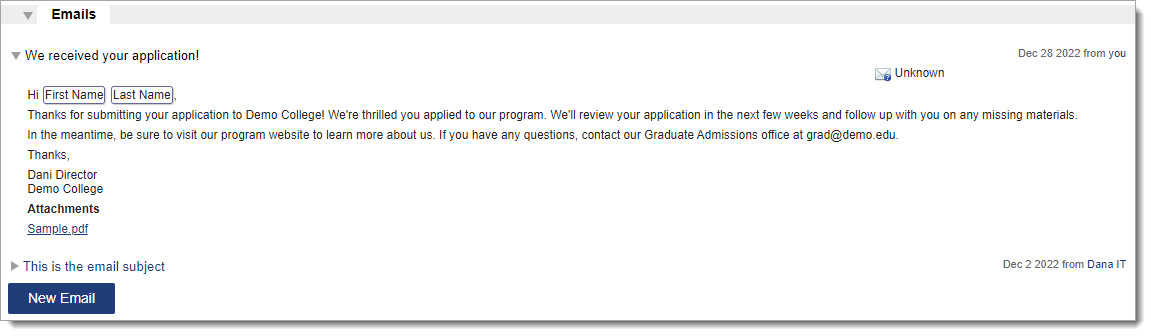
Viewing Email History Individually on the Emails Panel
WebAdMIT displays individual email history under the Emails panel on the Applicant Details page. The Emails panel contains a record of each correspondence that was sent to the applicant. Click the subject line to view the content of the email. If the email includes an attachment, you can download the attachment to view it.
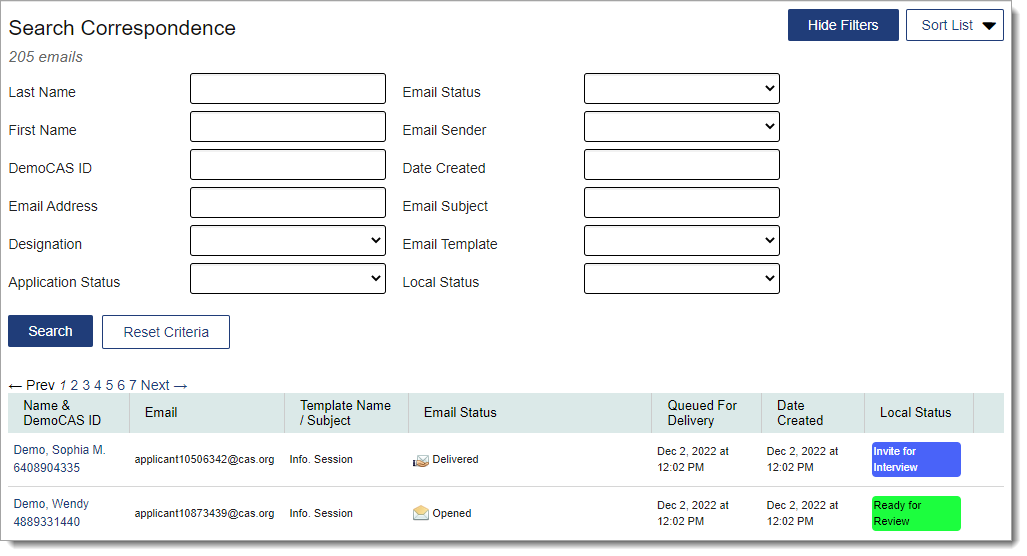
Viewing Email History in Bulk on the Search Correspondence Page
The Search Correspondence page allows you to view all correspondence that was sent or is waiting to be sent to applicants. Only applicants you have permission to view will appear in your results.
- Using the Menu Bar, open the Applicants panel, then click Search Correspondence.
- If filters are hidden, click Show Filters to display them.
- If desired, apply one or more filters to refine the list of search results. When using the Date Created filter, WebAdMIT searches for correspondence sent on or before the selected date.
- Click Search to view applicants or Reset Criteria to clear your filters.
Once your search is complete, click Sort List to sort your results by name, email address, ID number, and date created.
Email Statuses
Once you send emails in WebAdMIT, you can track email statuses. These statuses include:
- Bounced: the message was rejected by the recipient’s email server; you should verify the recipient’s email address. Contact the Client Support Specialist team at webadmitsupport@liaisonedu.com for further assistance.
- Clicked: the recipient received the message, opened it, and clicked a link or image.
- Deferred: the message was not sent and is in queue for redelivery.
- Delivered: the recipient’s email server received the message; however, this does not indicate that the applicant opened or viewed the message. The recipient may have recently changed their email address, or they may have rules or junk mail settings enabled that prevent the email from reaching the inbox. Applicants are encouraged to maintain updated contact information and disable junk mail filters.
- Dropped: the email provider is preventing delivery of the message. Messages are typically dropped when they contain an invalid or non-existent email address, or when the recipient marks a previous WebAdMIT message as spam. Contact the Client Support Specialist team at webadmitsupport@liaisonedu.com. Additionally, you may want to confirm with the recipient that you have the correct address and that they added donotreply@webadmit.org to their "safe senders" list.
- Failed: the message was not sent. Contact the Client Support Specialist team at webadmitsupport@liaisonedu.com for further assistance.
- Opened: the recipient received the message and opened it.
- Sent: the message is being processed for delivery to the recipient.
- Spam Report: the recipient reported the email as spam.
- Unknown: the status of the email can’t be determined. This status typically appears for recently sent emails and is replaced by another status within 24 hours.
Some emails will remain indefinitely in a status of Sent or Delivered if the recipient’s email server fails to process read receipts.
Email Troubleshooting
In some cases, emails sent through WebAdMIT may not reach their intended recipient. This can occur even if the email status is listed as Delivered, as the Delivered status simply indicates these emails have been successfully delivered to the recipient's email server.
After being delivered, emails may still be restricted or quarantined by the recipient's email server. IT teams can help resolve this issue by completing the following actions:
- Safe-list our sender IP address (167.89.98.50) and our sender email address (donotreply@webadmit.org), and
- Check SPAM traps and quarantines.
Use these links to obtain your email provider's safe-listing instructions:
If issues persist, contact our Client Support Specialist Team for more assistance.