Managing Users, Permissions, and Rep Assignments
Managing Users
Creating a New User
- Click Account and select EMP Settings.
- Click Users.
- Click New User.
- Enter the new user’s information. First Name, Last Name, Email, and Permission Group are required fields.
- Click Toggle Additional Information to add the user's primary phone number, title, or picture.
- Primary phone number, title, and picture can be added by the user.
When creating an account, the new user has two hours to click the link in the setup email and log in. If the link expires or the user does not receive the email, click the email icon to re-send the email and link.
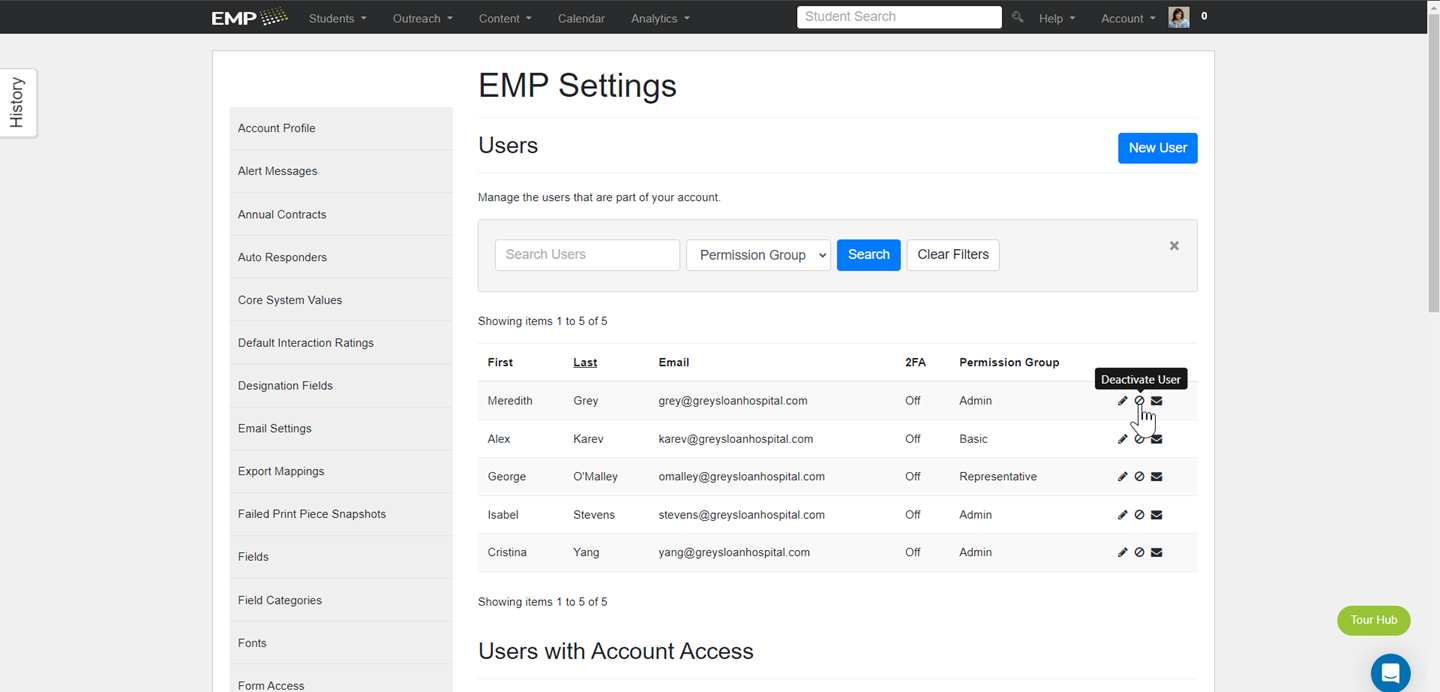
Editing Users
Use the pencil icon to edit an existing user's account.
Deactivating a User
Use the No icon to deactivate a user.
Permission Settings
What are Permission Groups?
Permission settings determine what users are able to view and what actions they can to perform. Properly managing permission settings helps control access to sensitive information, prevent unauthorized modifications, and ensure users have the appropriate level of access for their roles and responsibilities. EMP has three default permission settings you can configure and apply to users:
- Admin: Campaign Management and Configuration, User Audits.
- Representative: Calendar, Email, Analytics, Imports and Exports.
- Basic: Data Entry, Search, and Student Listing and Viewing.
Creating a New Permission Group
Occasionally, you'll need to create a Permission Group that does not fit into the default settings. To create a new permission group:
- Click Account and select EMP Settings.
- Click Permission Groups.
- Click New Permission Group.
- Name the permission group.
- Add a description specifying the group's actions and capabilities.
- Select the functionality the group can perform.
Assigning Permission Groups to Existing Users
- Click Account and select EMP Settings.
- Click Users.
- Click the Edit Pencil icon next to the user's name.
- Select the appropriate Permission Group from the drop-down.
- Click Save.
Users with Account Access
You can use this section to locate users who have access to your EMP instance but were not specifically created in that instance. For example, you might have an EMP instance for both undergraduate and graduate students, and your Dean of Admissions might have access to both accounts. The account the Dean was not created in but has access to will appear in this section.
Grayed-out users are either deactivated or do not have permissions set and will not be able to access this account.
Password Settings
For additional security to your EMP instance, you can:
- Set an expiration date to force users to create a new password after a certain time period.
- Disallow previously used passwords.
- Lock a user's account after a specified number of log in attempts.
- If a user is locked out, the EMP administrator, can reset the user's password by re-sending the activation email.
Rep Assignments
You may have admissions representatives who recruit students or review applications by state, major, etc. You can implement these configurations for EMP students using Rep Assignments.
Rep Assignments are rules you create to assign students to admissions reps. The student must meet all of the requirements in a filter to be assigned to a particular rep. The rules are applied consecutively, proceeding from top to bottom. In other words, if a student doesn't meet the criteria of the assigned group, EMP will assess the criteria they meet vertically and assign their representative from the topmost rule down. If a student doesn't fall into any of the assigned groups, they are assigned the default rep.
Creating Rep Assignments
- Click Account and select EMP Settings.
- Click Rep Assignments.
- Click the plus sign (1) first to add the group, then click the plus sign (2) once again in the group window.
- Select the Type of filter you want to apply to the assignment (e.g., State).
- Select the Operator, e.g., Equals.
- Select the Value, e.g., Alabama.
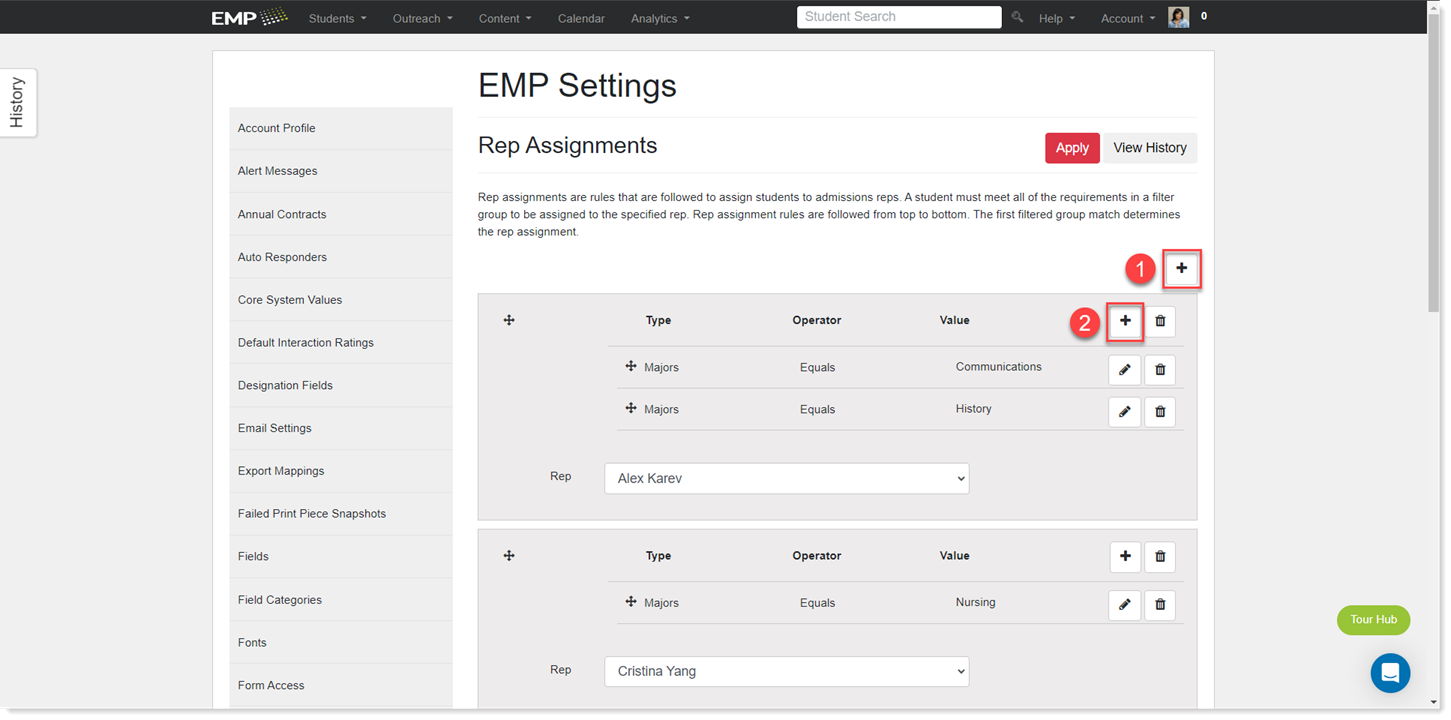
- Use the drop-down to select the Rep you want to assign to the group.
- Click Save.
- Click Apply.
You can include as many rules as needed within each group to establish the desired rep assignment.
Locking Rep Assignments
In specific instances, you might prefer to designate a particular representative for a specific student, deviating from the default rep assignment. This process, known as "locking" a rep assignment, can be easily applied or reversed as needed.
- Enter the student's name in the Student Search prompt.
- Click Enter or the Magnifying Glass to conduct the search.
- Click the student's name to access their Student Record.
- Click Information.
- In the Representative field, click Edit.
- In the drop-down menu, select the rep you would like to assign to the student.
- Select the Lock Rep Assignment checkbox.
- Click Save.
A Lock icon will appear next to the Representative heading. This means that the rep is now locked to the student and will remain as such, overriding any automated assignment scripts or imports.
Unlocking Rep Assignments
To Unlock a rep from a student record, click Edit in the Representative field, then uncheck Lock Rep Assignment. The student will now be assigned a rep according to automated assignment scripts.