Managing Application Properties
In Outcomes, Custom Properties are customized fields you can create to capture additional information. You can use them to store extra fields, build scores, or create flags for key information.
Custom Properties come in three forms, as described in the table below.
|
Property Type |
Population Method |
Typical Use Cases |
|---|---|---|
| Standard Property | Users or integrations enter values directly on applications. | Staff notes, Internal IDs, Supplementary applicant information, etc. |
| Calculated Property | Outcomes evaluates a JavaScript expression against application data and stores the result. | Application scores, eligibility flags, etc. |
| System Property | Outcomes sets the value automatically and users cannot edit it. | System managed fields like timestamps or other database information. |
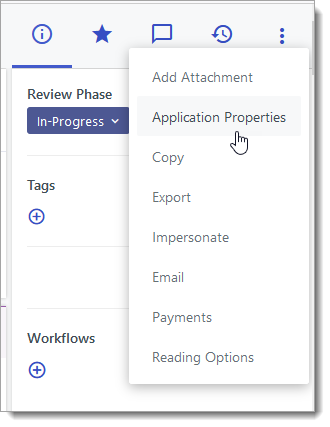
By default, Custom Properties can be reviewed for applicants by going to Application Properties in the More Options menu on an application, but you can edit the placement of these fields by going to Application Properties in the Application Setup section of the Settings menu and clicking the Edit Pencil.

Custom Properties can also be included in exports and filters.
Creating Custom Properties
Custom Properties can be used to track any additional applicant information. You can create them for any value that should be available when viewing applications, building segments, or creating reports. To create a Custom Property:
- Navigate to the Settings menu and click Application Properties under the Application Setup heading. From here, you can review all of your existing Custom Properties.
- Click the Edit Pencil.
- From the Manage Custom Properties page, you can add, edit, reorder, or delete Custom Properties.
- To add a new Custom Property, select the type of Custom Property you want and drag it to your desired location among the existing Custom Properties.
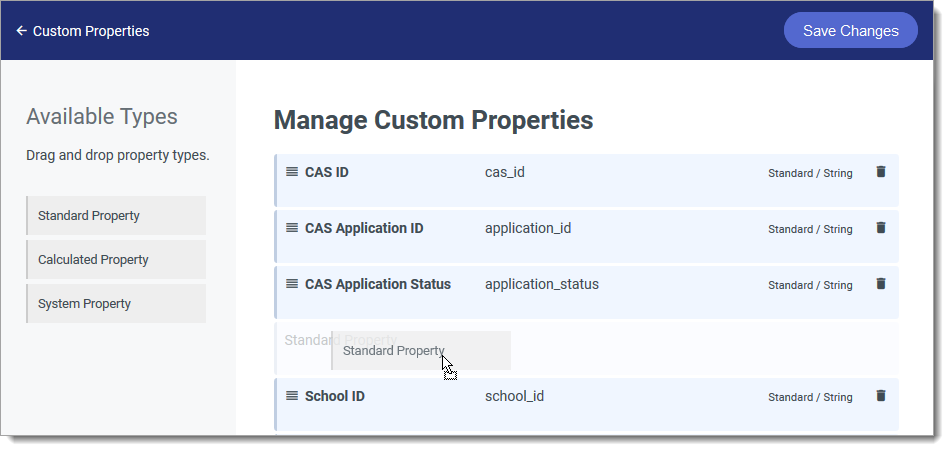
- To add a field that can be viewed and edited from the applications, select Standard Property. For example, this can be an internal application ID, a re-applicant indicator, or the date the applicant was last exported.
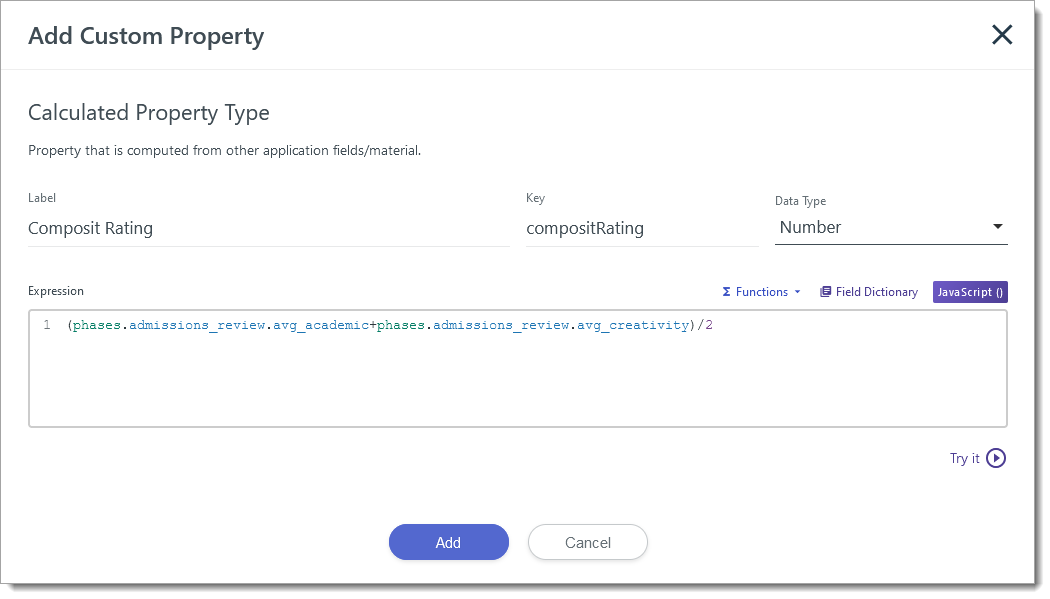
- To add a field that is calculated based on other fields, select Calculated Property. For example, this can be a field that calculates applicant scores, averages reviewer ratings, or combines test scores. To work with a Calculated Property, you'll need to enter a JavaScript expression to indicate how the calculation should be done. Calculated Properties are evaluated automatically whenever the application changes and are not directly editable. Review Understanding Calculated Properties for more information.
- To add a field that is only populated through an API, select System Property. This is a field that automatically updates based on the information it receives through your data integration processes, and cannot be directly edited.
- After placing the field as desired, configure its name. The Label is how the field appears on the application, in exports, and in filters. The Key is how the field is referred to in the database (e.g., when working with JavaScript expressions).
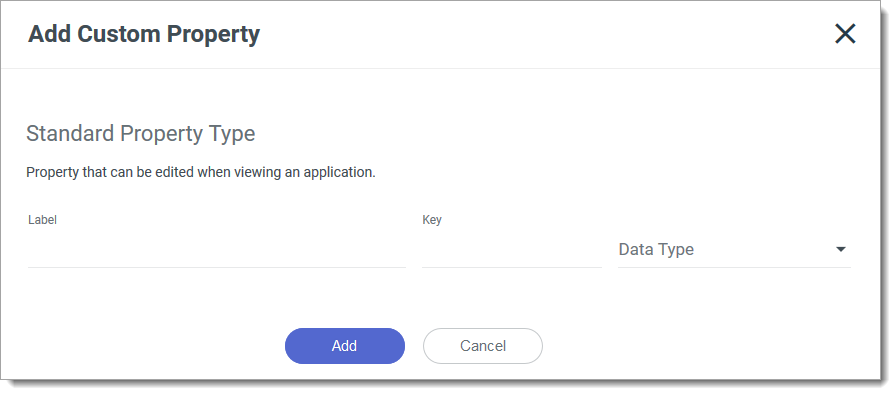
- Select your desired Data Type. These include:
- Boolean: fields that can be set to True or False (Yes or No).
- Number: fields to be populated with a numeric value.
- String: fields to be populated with text values.
- Date: fields to be populated with a date.
- JSON: fields that can be created with JSON code for storing structured data that may not be suitable for a single property value.
- File: fields that are completed by uploading a file.
- Options: fields designed to offer a multiple-choice drop-down.
- Concealed: fields that are only visible to users with the View Concealed Fields permission. Use this for sensitive internal notes or information you do not want most users to see.
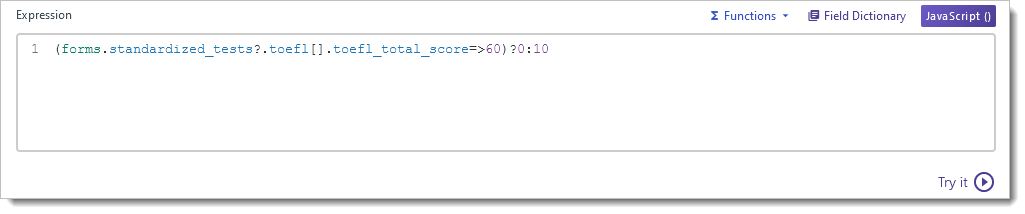
- If the field is a Calculated Property, enter an expression indicating how the field should calculate its value. You may also consider validating your expression before saving it. To do so, click Try it, select a sample application, and review the output.
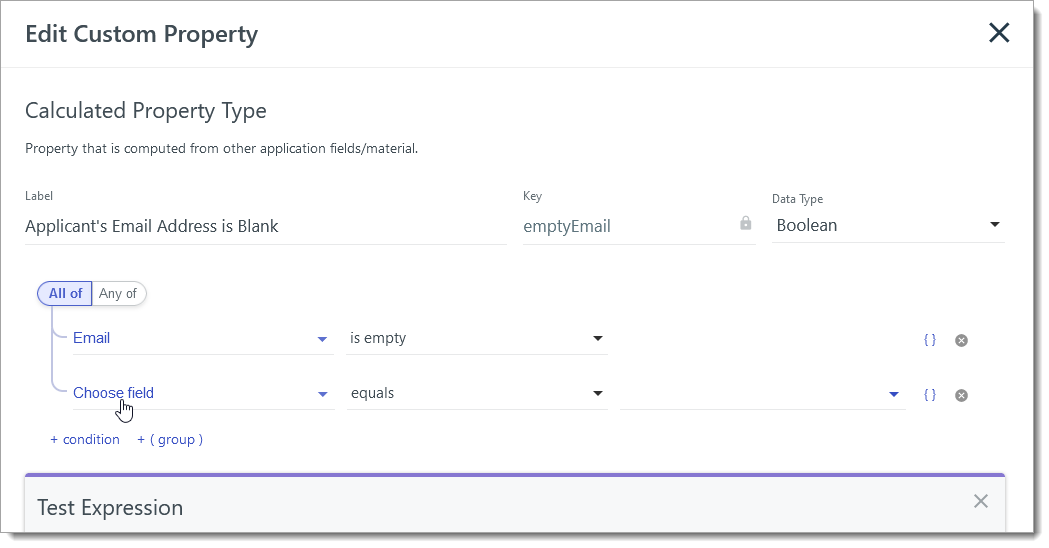
- The Calculated Property Type of Boolean indicates true or false for the conditions you set. Use the Condition Builder to establish what conditions need to exist to result in true. Review Handling Table Based Data or Null Fields for more information regarding how null or empty values are handled.
- When you're ready, click Add. Then click Save Changes at the top right. Your new field is now available to work with.
Understanding Calculated Properties
Calculated Properties are custom properties that are configured via JavaScript expressions and are dependent on data found in other fields. For example, a Calculated Property can produce applicant scores, average reviewer ratings, or provide a calculation of other numeric values like test scores or evaluations.
Use Calculated Properties when:
- You need a value to be visible and always current on the Application Summary, Sidebar, or Application Grid (e.g., a composite score, an eligibility flag, or a combination of multiple data points).
- You want to drive simple Yes/No (boolean) flags from complex criteria, to simplify segments and reporting.
To build a Calculated Property, follow the guidance under Creating Custom Properties. Keep in mind:
- Calculated Properties are always up to date. Note that Outcomes occasionally re-indexes, or refreshes and recalculates fields on the application (for example, because new data is imported or other updates are made). After re-indexing, all Calculated Properties on that application are re‑evaluated and refreshed automatically. This means you don’t need to wait for a scheduled automation or workflow, and if you've set the property to appear on the Application Grid or in the Application Summary, the displayed values are always current.
- Saving a new Calculated Property requires re‑indexing all existing applications to backfill the value, so, as a best practice, creating or significantly modifying Calculated Properties in very large organizations is best done during off‑peak hours to avoid performance impact for active users.
- Before saving, always test your property using the Try It feature on at least one application.
- When working with the Try It feature, consider using your browser's developer tools to troubleshoot errors or unexpected output. The JS expression preview response includes details about any syntax or runtime errors (e.g., unexpected token, missing quotes, or invalid field references).
Using JavaScript Expressions in a Custom Property
JavaScript is a programming language commonly used to add interactive elements to a webpage. In Outcomes, JavaScript expressions allow you to dynamically incorporate other data points from the software in a Custom Property. This functionality can be used to design an application scoring system.
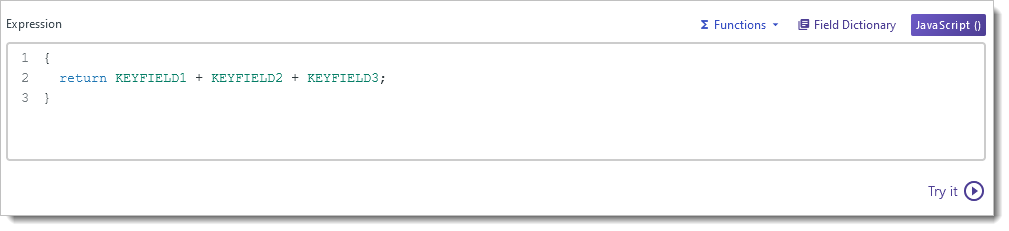
Building a score using JavaScript expressions requires using keys that represent the fields you want to include. For example, entering the expression below produces a sum of the fields called KEYFIELD1, KEYFIELD2, and KEYFIELD3.
Before referencing any field key in these properties:
- Confirm that the key is correct via the Field Dictionary or the form where it lives.
- Confirm that the data you are targeting can actually exist on the application (e.g., at least one evaluation has been submitted, or at least one experience exists, where applicable).
Handling Table-Based Data or Null Fields
Many Outcomes fields, such as Experiences, Evaluations, and other table‑based sections, are arrays. Sometimes referred to as "one-to-many" or "has many" fields, this refers to when an applicant can have zero, one, or several responses to a single question.
When writing JavaScript expressions in with these fields:
- Check that at least one row exists before referencing its fields. Otherwise, your expression can produce errors or return undefined when no data is present.
- Note that returning null (without quotes) is different from returning an empty string. Null is a true null value (no answer) and is treated as “not answered” in segments and filters, whereas an empty string is still a string value and may be treated as "answered."
To learn more about working with JavaScript in Outcomes, review Working with Advanced Configurations.
Using Functions in a Custom Property
To make working with JavaScript Expressions easier, the Expression window offers a Functions option. This feature contains functions included in your account's library of JavaScript. With Functions, you simply select the function you want to use and then replace the variables with actual fields from your Outcomes database.
To work with Functions:
- Go to the Expressions area and click ∑ Functions.

- Select one of the functions from the dropdown. This adds a JavaScript Expression to the Expression window.
- In the Expression window, replace the variables it provided with the appropriate fields.
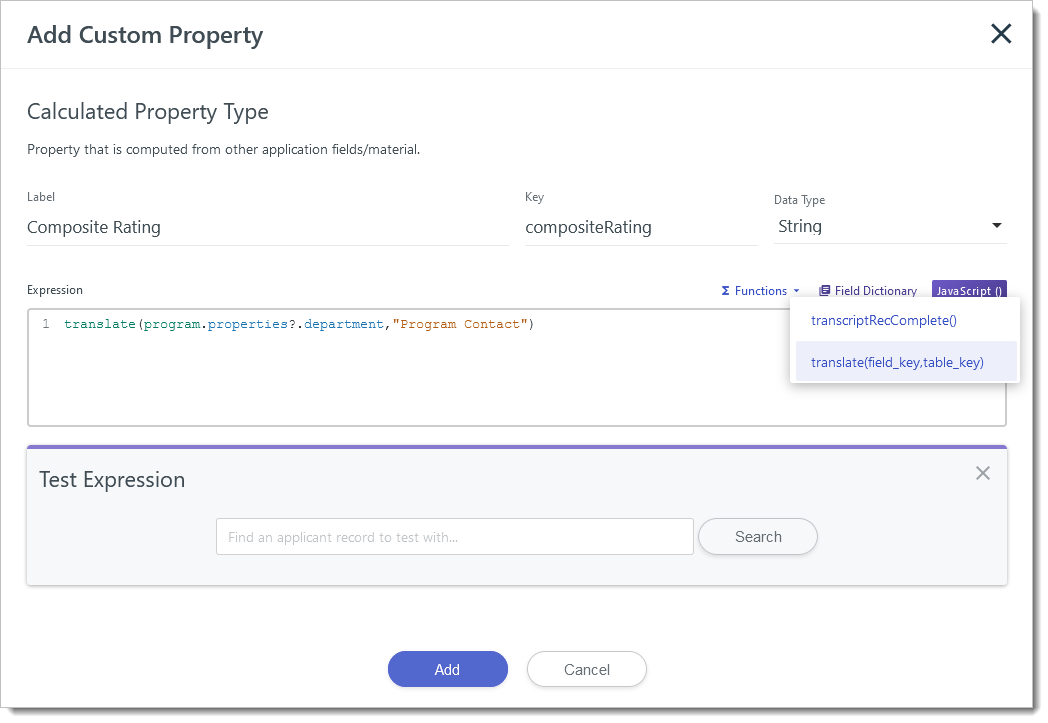
By default, your account includes a translate(field_key,table_key) function that allows you to pull in values from your Translation Tables by finding the value in the field you've entered, and replacing it with the appropriate translation.
For example, if each department at your institution has a different contact person that its applicants should communicate with, but those contacts may change over time, that contact information can be stored in a Translation Table. Then, the resulting contact information can be stored on each application in a Custom Property to be included as a variable in exports or in communication with applicants.
In this example, the Translation Table this Custom Property is pulling from may look like this:

The function translate(program.properties?.department, "Program Contact") is used in this example. If the program.properties?.department field on the application is "Graduate", the resulting output is "Jakob Ecklud (jecklud@liaison.edu)". Setting this translation table makes it easier to maintain up-to-date information when contacts change.
The functions available for you to use in your account will vary based on what has been configured for you.
Working with the Field Dictionary to Build JavaScript Expressions
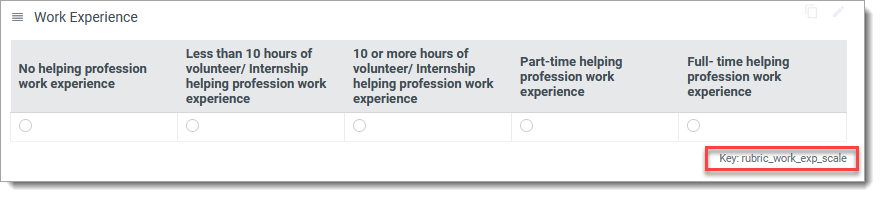
The Field Dictionary provides a database of every field available to you. Using this, you can determine what keys to use in your expressions. As seen below, keys that come from customizable forms (e.g., applicant forms, inquiry forms, evaluation (review) forms, etc.) can also be found on the applicable form near the associated question.
Fields that aren't sourced from these forms can be identified in the Field Dictionary. To use this dictionary:
- Click Field Dictionary in the Import/Export section of the Settings Menu.
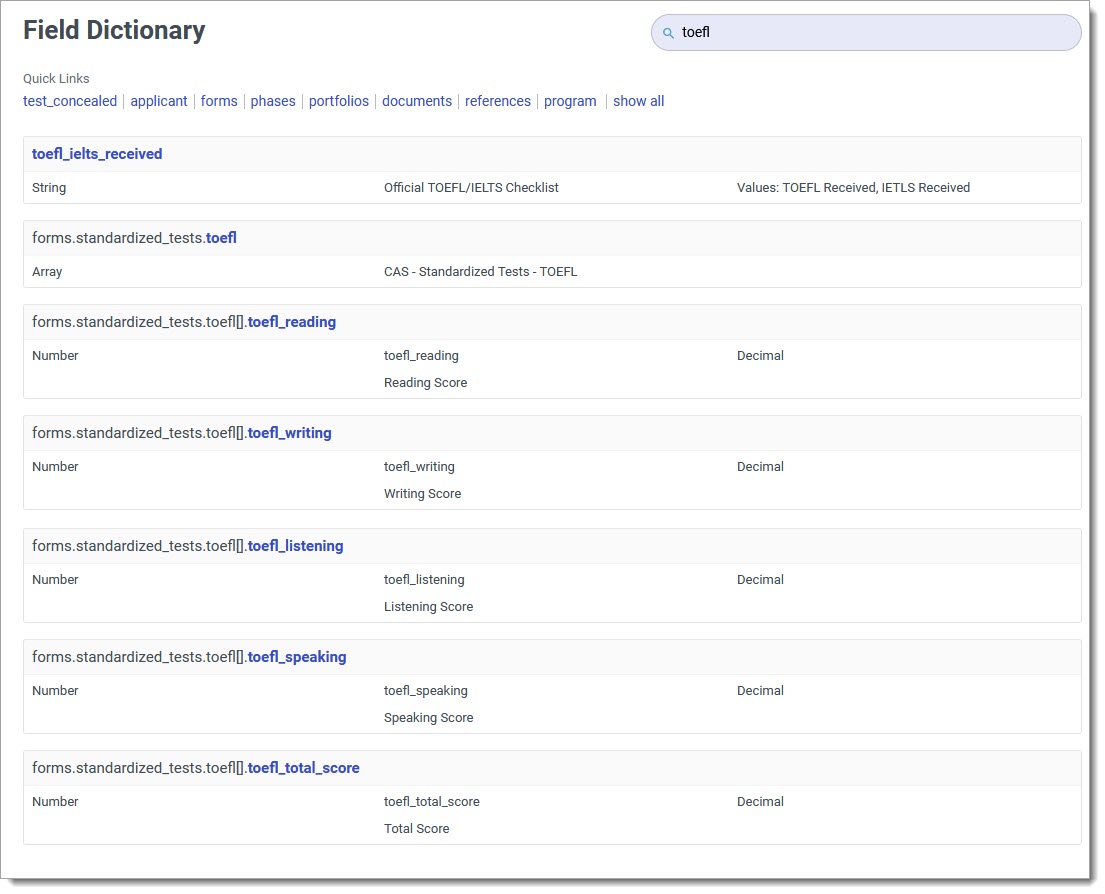
- From the Field Dictionary, click one of the Quick Links or use the Search bar to locate your desired field.
- The Field Dictionary provides information regarding the key to use (e.g., forms.standardized_tests.toefl[].toefl_total_score), the data contained within the field, and the format the data appears in (e.g., String, Number, or Array). Review the information for the fields you want to use.
- Copy the keys you want to use and place them in your JavaScript expression.
- Continue building on your expression or adding new Calculated Fields with different expressions.
- When ready, click Save Changes.
Note that if you reference a field key from a table or array that doesn't contain an applicable value (e.g., no evaluations or experiences exist), the expression may save but will never return a value. This may be difficult to diagnose without using the Try It feature.
Viewing and Editing Custom Properties
Note that Standard Properties are editable, but calculated and system properties are view‑only and must be changed in Settings.
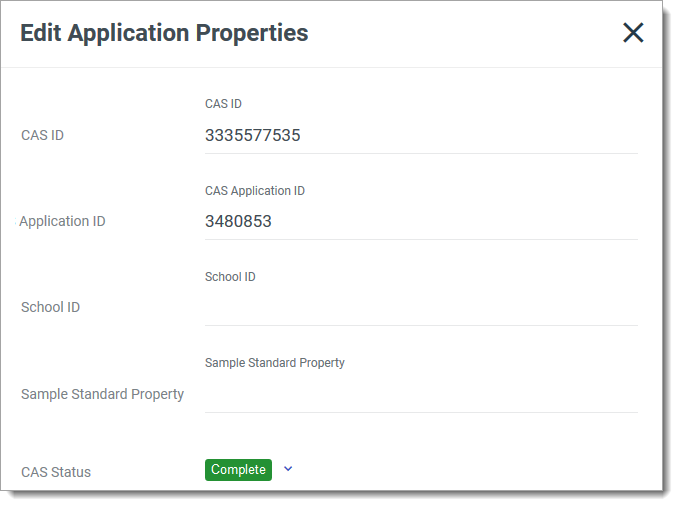
Standard Property types can be updated or reviewed for applicants individually by going to Application Properties in the More Options menu on an application.
Calculated and System Property types can also be viewed there, but cannot be edited directly.
If you'd like to display your Custom Properties more prominently, you can add them to the Application Summary or Sidebar.

You may also choose to add your Custom Properties to the Application Grid, using the Grid Customizer. This allows you to quickly review and sort applications by this information.

You can edit these fields by returning to Application Properties in the Application Setup section of the Settings menu.