Configuring Segments
What are Segments?
Segments allow you to group and manage applicants by common criteria. For example, you can create segments of applicants missing evaluations, applicants with a home town state of NJ, applicants from a specific medical school, etc. Once you create a segment, you can access it as needed and perform various actions, such as emailing those applicants or moving them into a new phase.
Video Overview
Working with Segments
Default Segments
As a foundation, ResidencyCAS comes with several preconfigured segments to make it easier for you to get started filtering your applicants. On the Application Grid, click the segment selector to choose a segment from the ResidencyCAS Default Application Segments.
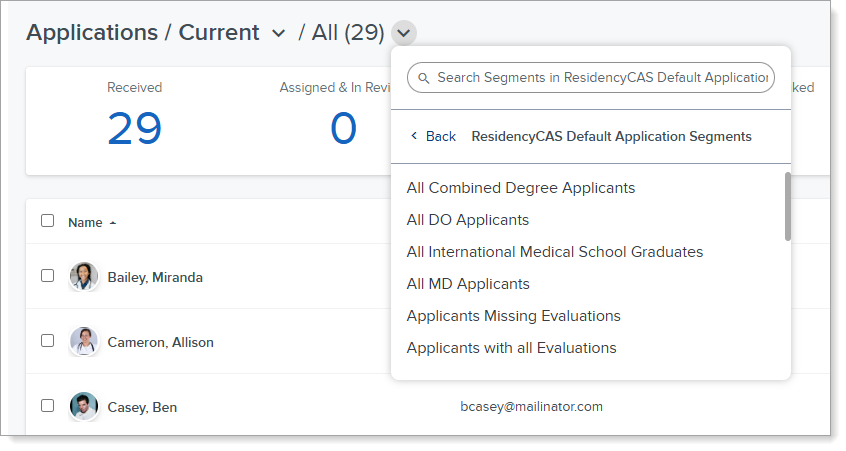
Note: for commonly used segments, review our article on How To Create Frequently Used Segments.
Building Segments
When you build a segment, you apply it to your applicant pool to see all of the applicants who meet the criteria you specify. For example, you may want to find applicants who did not pass Step 1 on their first attempt. After you create the segment and apply it to your applicant pool, your application grid shows only the applicants who did not pass Step 1. On the application grid, click the checkbox next to the applicants you want to work with. Then, you can:
- Email selected applicants important information.
- Move applicants to a different phase and assign applicants to reviewers.
- Note: you can automate your review workflow by connecting reviewers and evaluation forms to specific phases. Then, when you move applicants into a phase, the designated reviewers are automatically assigned the application and evaluation form for review.
- Tag applicants (i.e., label) for tracking or categorization purposes.
- Create a chart focusing on a particular data point for these applicants.
- Export their application PDFs.
Creating Segments
You can create segments in two places within the Program Portal:
- The Applications Grid.
- Application Segments in the Settings menu.
Creating Segments from the Applications Grid
- Click Segment to open the segment builder.

- Click Add Criteria, then, select the category of data.
- Note: data points from the application, such as USMLE scores, Medical School, Current Address, etc. can be found in the Application Form category.

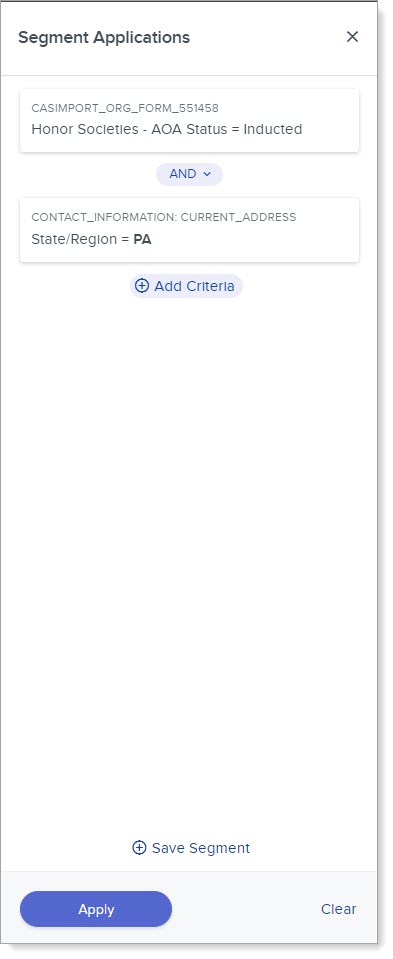
- You can add additional criteria, as needed, using the AND/OR operators. For example, you might want to find applicants who are part of AOA and in Pennsylvania. You can add additional criteria to specify that you want applicants who have been inducted into AOA AND who are in your state.
- Once you've added all criteria, click Apply to apply the segment to your applicants.
- If you anticipate using the segment regularly, you can save it for easy access in the Segments Selector. To save your segment:
- Click Save Segment in the builder.
- Name your segment and place it into a category. Categories are used to group your segments; you can use an existing category or create a new one.
- Then, click Create Segment.
- The saved segment can be found in the Segments Selector which is a useful tool to work with in the applications grid.

6. To remove the segment from your applicant pool, click Clear.
Creating Segments from the Settings Menu
- From the Settings menu, open the Application Review section, then select Application Segments. Here you can view the current list of segments. Click any segment to view its criteria.
- To create a new segment, click the + icon. Begin by naming your segment and placing it into a category. Categories are used to group your segments; you can use an existing category or create a new one. Then, click Add Criteria and start building your segment. In the example below, we're searching for applicants whose current address is in the state of New York. When you've finished adding the criteria, click OK to proceed.

- You can add additional criteria, as needed, using the AND/OR operators. For example, you might add additional criteria to specify that you want applicants who reside in New York AND who are applying to Program A. Once you've added all criteria, click Create Segment.
Creating Segment Categories
When you create a segment, all users in your organization have access to it. If multiple people in your organization are creating segments, consider creating categories to organize the segments you create. To create a category:
- Click Save Segment in the builder.
- Name your segment.
- Click the Choose Category drop down.
- Click Create Category and name the new category.
- Click Create and Assign.
- Click Create Segment.
- The saved segment can be found in the Segments Selector which is a useful tool to work with in the applications grid.
Managing Segments
- From the Settings menu, open the Application Review section, then select Application Segments. Here you can view the current list of segments. Click any segment to view its criteria.

- Remove or add criteria, if necessary.

- To delete, categorize, or copy segments, use the checkboxes.
