Advising in the Student Success Center
The Student Success Center (SSC) is a central location for student information for you to capture, monitor, and evaluate student persistence and progression. Advising records include a Record Type (Accolade/Kudos, Alerts, Hold, Meeting Notes, or Referral), and additional information, such as Category, Subcategory, Type, and Subtype. Advising Activity is displayed on Contact records, including the date, Advisor details, and the type of advising that occurred. Additional configuration allows you to identify specific Academic or Behavioral issues that may be part of a student’s struggle.
Viewing Advising Information
Your Administrator determines the Advising information available and configures the display of Alerts, Referrals, and Action Plan Items for students. For details on setting these fields, see Student List Fields.
- Alerts can be configured into various categories or subcategories. Flows can also be configured to create tasks, email students, or update a field when specific data is entered or updated, depending on your institution's needs. For example, you can set up a Flow to send an Email Alert to a Student when a new Referral is added.
- Note: Advising alerts are different than Faculty Early Alerts. Advising alerts pertain to student overall success, while Faculty Early Alerts refer to a student's success in a particular course.
- Referrals allow Advisors to guide a student to additional support services when needed.
- Action Plans allow Advisors/Staff/Faculty to capture concerns at the source and trigger an action. You can be proactive in student success efforts by creating and delivering pre-defined or personalized Action Plans to students. As tasks on an Action Plan are “completed”, the next task is delivered. For more information on Action Plans, see Action Plans.
Advising Activity
For the selected student, you can quickly 'Take Action' by using any of the following activities:
|
Advising Activity |
Description |
|---|---|
| Alert |
Add Alerts to a student’s advising records to log a problem or issue related to the student:
|
| Advising Note | Add a note with a Category and Type. This could be a summary of your meeting with the student, items you want to discuss with the student, or a summary of options you offered the student extra credit. |
| Hold | Add Holds to track academic, financial, judicial, or other issues a student may have that could impact their academic goals. For example, you can create a Registration Hold for students who haven't met with their Advisor. |
| Referrals and Meeting Notes |
Create a Referral to guide a student to additional support services when needed:
|
| Add Action Plan Item(s) | You can add an Action Plan Item or copy an Existing Action Plan template to a student’s record. The Point of Contact will allow students to reference the appropriate staff member responsible for helping the student complete the Action. |
| Accolade/Kudo |
You can add an Accolade or Kudo to praise a student who has achieved a goal or otherwise excelled:
|
| Communication | Communication is used to Log a communication you had with the student (this displays as a ‘task’ on the advisor's list). |
SSC enables the swift addition of actions (such as notes, alerts, referrals, etc.) by generating an advising activity. You can modify pre-existing activities or issues by accessing and editing an existing advising record. Once created, these actions display as an Activity on the Student record in the SSC.
Notes:
- Any modifications to Activities will move the activity to the top of the Timeline. The Timeline is available in the bottom navigation bar or from an individual student record by selecting the student from the Student list:
- For Notes to display to other users in the SSC, they MUST be marked as 'Public' in the CRM under 'Communication Selections/Controls'.
- Choosing to make an Advising Note 'private' only applies to the Student Success Center. This flag does not cause the record in Salesforce to become private:

Creating Advising Activities
- Navigate to the Student Success Center.
- On the Students list (My Students or All tab) click the ellipses [1] for the student to which you will add an activity.
- Click the activity to add, such as Advising Note [2].

- Related Student will default.
- Select Category, Type, and enter your Notes.
- Click Make Private if the Advising Note should be Private.
- Click Closed if the Advising Note should be Closed.
- A confirmation message will display with options to add a new note or indicate Email Options:
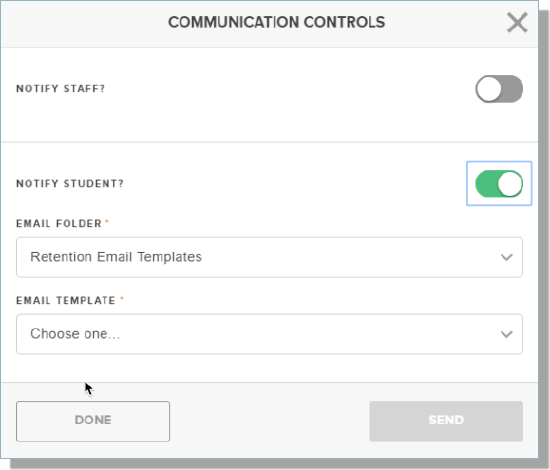
On submission of certain actions, you can further communicate with the related student or other staff members via Email Options. The Notify Staff and Notify Student are OFF by default. The Notify option is available for Advising Notes, Referrals, and Action Plan Items.
- From the Action you've created, click Save.
- Select Email Options.
- Toggle the Notify Staff and/or Notify Student options.
- Select an Email Folder and an Email Template for the notification.
- Click Send.
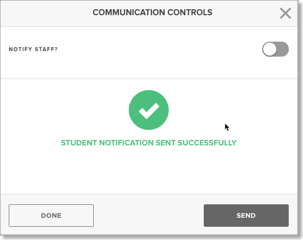
Note: If the message is sent, you will see a message 'Student Notification Send Successfully'; otherwise, an error will display.
- Click Done.
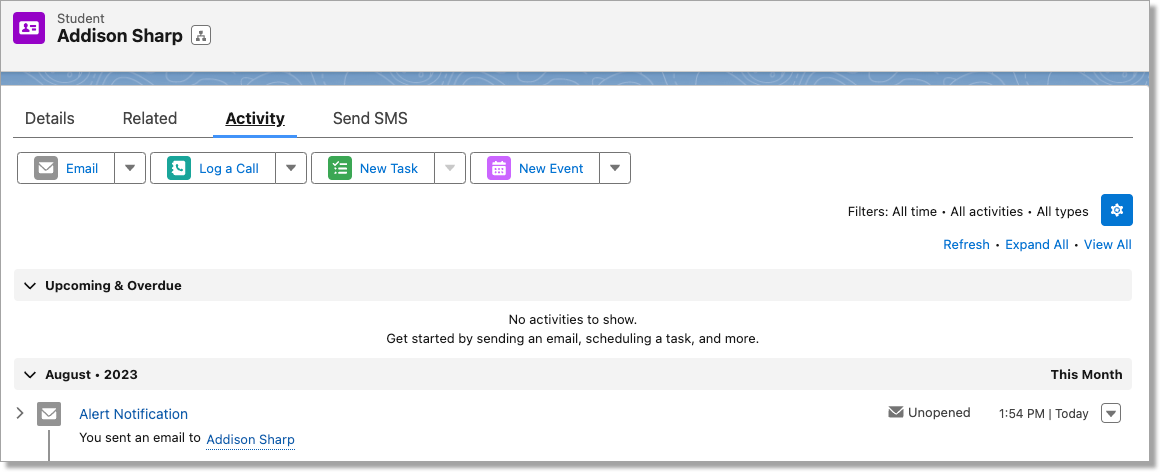
- You can view the Email Message from the Student/Staff's Contact record under Activity History:
Success Team Members
You can view all the members of a students Success Team by clicking the student record and selecting Success Team from the picklist:
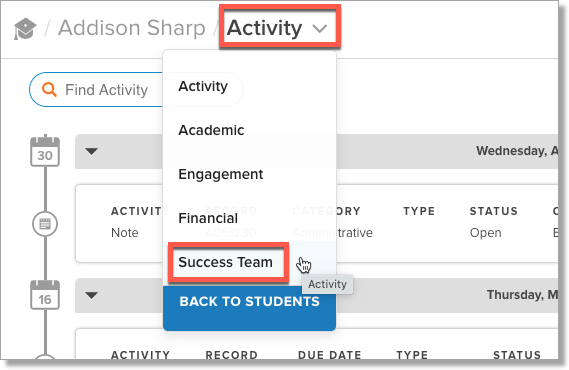
This will display a list of the students' Success Team Members along with Category, Email, Phone Number and an indicator for the Primary Team Member.
Managing Filters
Filters allow you to create, edit, and save various filters in SSC to locate a list of students to focus on quickly.
- Navigate to the Student Success Center tab.
- Click Students from the Navigation bar.
- Click the filter icon [
], and the filter sidebar will appear:

Note: When you search for Students using the Search Field at the top of the page, the Filter sidebar will be automatically hidden. This is because the Student search and Filter sidebar are mutually exclusive; you can only use one feature or the other, but not both simultaneously.
- From the panel, you can select from My Filters (filters you created) or All Filters (filters created by all SSC users, including you) and add or remove filters.
Note: Users can only edit/delete filters that they created but not the filters created by other users.
- To Add a new filter, select the +, enter criteria, and toggle Save Filter to Save the filter for later use.
- Enter a Filter Name and click Save & Apply. The filter will be available under the My Filters option in the picklist.
Note: The Filter Name must be unique.
Creating a Filter
1. Navigate to the Student Success Center app or tab.
2. Click Students from the Navigation bar.
3. Click on the filter icon [], and the filter sidebar will appear.
4. Select the +
5. Enter criteria by selecting a Field, operator, and Value. Click + to add another criteria or - to remove criteria. You can add Advanced Filter Logic by clicking the Advanced Filtering toggle.
6. Click the Save Filter toggle to Save.
7. Click Save & Apply. The filter will be available under My Filters in the picklist.
8. Once the filter is applied, an indicator will display on the filter icon [].