Communicating with Applicants Quick Start Guide
Outcomes allows you to communicate easily with applicants using emails.
Sending Emails to Applicants
The easiest way to send emails to applicants is from the Applications Grid. To do this:
- Go to the Applications Grid and select your desired filters, or search for your desired applicant(s).
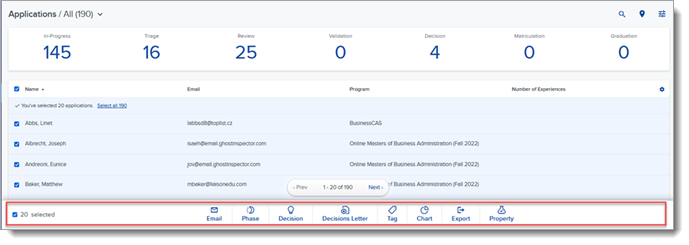
- Click the checkboxes to the left of the desired applicants’ names or click the checkbox at the top left to select all applicants on the page.
- If the list of applicants extends past the first page, you’re presented with an option to select the entire batch. Click Select all… to include all of the applicants.
- From the menu that appears on the bottom, click Email to send an email to these applicants.
- From the Send Email panel, select an email template, if applicable. The templates offered here are those created under Email Templates in the Application Setup section of the Settings Menu and are separate from Marketing emails.

- Adjust your email settings as desired, including the following:
- From Email Address: the address that appears to recipients as the email sender.
- From Name: the name that appears to recipients as the email sender.
- Reply To: the email address that Outcomes will use if the recipient replies to your email.
- Reply To Name: the name that will be associated with the Reply To address.
- If you want to send an email that is not from a template, create it from scratch using the Message section.

- If desired, click Attachment to include up to five attachments in your email. Each attachment can be up to 8 MB in size.
- Review the email using the Preview or Send Test Email options.
- When ready, click Send.
Note that the process above describes sending emails from the Applications Grid in Outcomes. Alternatively, you can send emails to individual applicants by clicking Email under the More Options (3-dots) menu on an application.
For improved email deliverability, the editor doesn't provide a BCC option. Some institutions want specific users to be notified when certain messages are sent (e.g., denial letters). As an alternative to using BCC, after sending these emails, you may consider using workflow automation or batch actions to assign a task to the user who needs to be notified, or apply a tag to the recipients of the email, allowing them to be easily identified.
Visit the Marketing section to learn about sending emails using the more advanced tools available with the Campaign features.