Configure Documents
Overview
In this section, you can ask applicants to upload supplemental documentation, such as:
- School-specific forms
- Additional recommendation letters
- Supplemental application forms
- Test score reports
- Licenses
If you choose to require this, be sure to provide specific instructions. If your CAS requests or requires documents in the application, those document types are identified under the Required Documents and Optional Documents headings.
All activated document types are grouped together based on their requirements (i.e., required or optional).
Adding Documents
- Click the Editor link at the top.
- Click the Documents checkbox on the left, then click the Documents link.
- In the Applicant Instructions field, add text prompting applicants to upload the document types and relevant instructions.
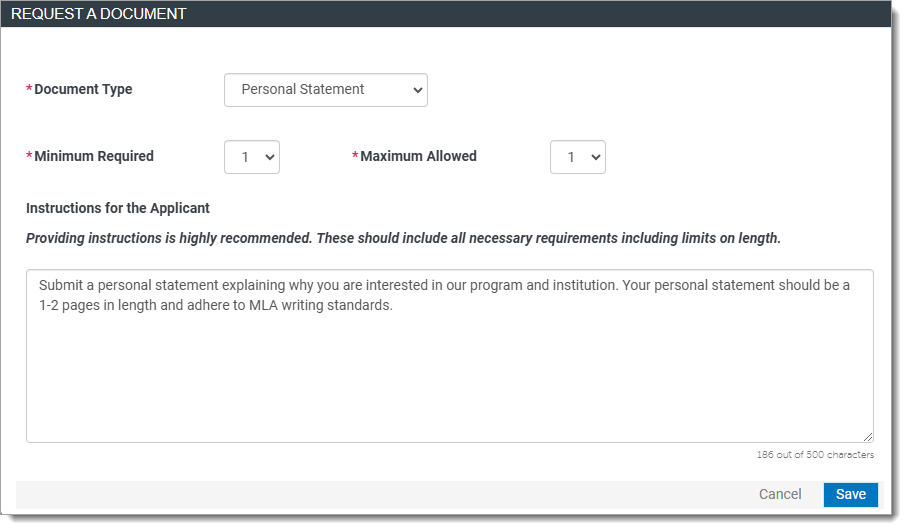
- Click Request a Document.
- Select the applicable document type from the drop-down. Each CAS decides which document types are available. If you have any questions about the available document types or how to use them, contact a member of your account team.
- Select the minimum number of documents you require applicants to upload before they can submit to your program.
- Select the maximum number of documents that applicants can upload. You cannot collect more than five documents for an individual document type regardless of whether it is required or optional.
- Enter document type-specific instructions.
- Click Save.

Managing Documents
Once your document types are added, you can make edits as necessary.

Reordering Document Types
Reorder your document types by dragging and dropping.
Editing Document Types
Edit your document types by clicking the pencil icon.
Deleting Document Types
Delete your document types individually by clicking the trash icon.


