Managing Trips
Entering Travel Details for Events
If an event requires travel to either a School or a Group of Schools, you can specify them here, assuming you have previously set up Travel Groups.
- Navigate to the Organization Events tab.
- Click the Event Name where you want to add Travel Details.
- Scroll to the Travel Details section.
- Enter the following information:
- School: a lookup field that associates the event with a particular school.
- Travel Group: a lookup field that associates the event with a Travel Group.
- Include School and Travel Group: If checked, the email travel query will send emails regarding the event to all students in the School field (see above) and students at those schools listed in the Travel Group field.
You can also associate your Event with an Account or group of Accounts by configuring the Next School Visit Trigger.
Sending an Email to the Event Contact
- Navigate to your Trip and select the > to view the details.
- Locate the Event you wish to view.
- Select the
icon to view the Event details.
- Click the email for the Event Contact. This will take you to your Default Email Program, populated with the Contact email address.
Viewing your upcoming trips
Navigate to the Travel Planner tab. The Trips list will display a list of upcoming trips. By default, the next 50 trips will display.
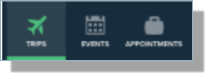
The Trips list can be accessed by using the bottom navigation bar:
The following information will be displayed for each Trip in the list:
- Staff indicates the Staff member responsible for the Trip.
- Email is the email address for the Staff member.
- Trip is the name associated with the Trip.
- Start Date is the start date of the Trip.
- End Date is the end date of the Trip.
Selecting the navigates you to detailed information about the Trip, such as Events, Trip Information, and Notes.

Viewing Trips for your Team or Staff member
- Navigate to the Travel Planner tab.
- If you don’t see the Travel Planner tab, please see: Creating the Travel Planner tab.
- You can either use the Search box to type a Staff member’s name OR create a filter:
- You can quickly access sorting and filtering options using the icons in the top right of the window.
- Using the
icon allows you to quickly switch from an Ascending sort to a Descending sort.
- The Sort/Filter icon
allows you to edit sort and filter options on the window. Selecting the icon displays the default sort (Name). Select the chevron [>] to expand more Sort options: Staff, Email, Trip Name, Start Date, and End Date.
- To Filter, select the chevron [>] to expand filtering options: Trip Name or Staff. As you enter text, available options will display. Check the lists you wish to filter. There is no default filter.