Creating Assignment Groups
Note: It is HIGHLY recommended to create/test Group Assignments in a sandbox PRIOR to moving to a Production Org*. You can keep the previous version of Group Assignment running while you setup new Assignment Groups. Once complete, follow the migration steps to move your new groups from one Org to another.
Before you begin: If one of the objects being used by Group Assignment is enabled for use in Source to Master in Recruitment Manager Preferences, you must have a valid Source to Master record and mappings for the object you are creating a Group Assignment trigger for. Otherwise, you should disable the Source to Master setting for the object in Recruitment Manager Preferences before creating the trigger.
- Navigate to TargetX Builder tab. Select Group Assignments.
- Select the + in the top right corner of the window. You will now see the New Group window.
- Enter the following information about your group:
- Name for the group (ie: Northeast Territory)
- Description of the group.
- Select the Target Object that will be used to configure criteria for this group.
- Indicate the Order for the group. The order determines how the group will be evaluated when the assignment occurs. For example, If a student meets the criteria in a group with an Order of 1, they will be assigned to that group (even if they also meet the criteria in a subsequent group).

- Select Create.
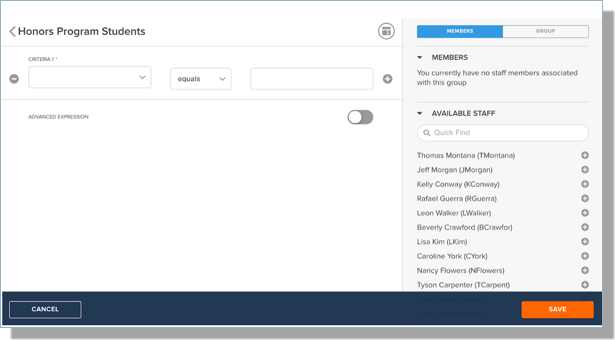
- You will now be taken the the Criteria and Membership window.
- Select Add (+) criteria to the group.

- Add multiple criteria (optional) - You can add additional options to your criteria by using the + sign on the right. Or remove a line of criteria using the - sign on the left.
- The new criteria line is added immediately below the line on which you selected the + to add new.
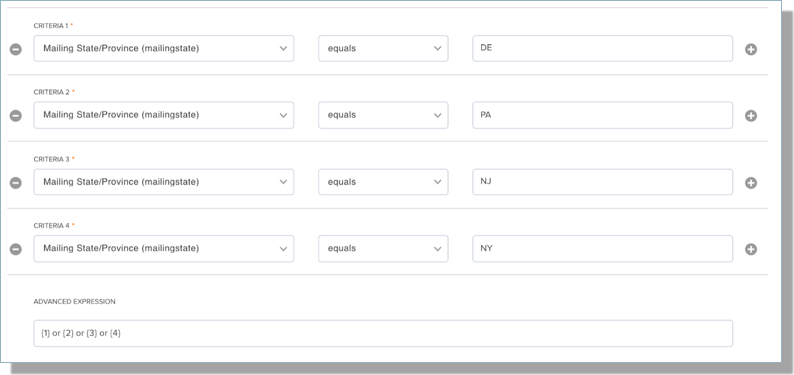
- Click on the Criteria1 picklist and select a field (ie: Mailing State). The available fields are based on the Target Object that was selected.
- Select the appropriate Operator for your criteria (ie: equals). For details on Operators, see Writing a condition set in Portal or Group Assignment
- Enter the API Name for the criteria (ie: Delaware).
Note: All group filters must be valid.
- If you need to use Advanced Expressions, select the
to make the field available.
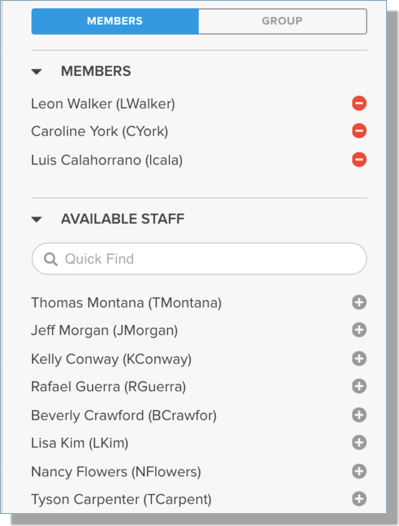
- Add Members by selecting the + button next to the appropriate Available Staff name. This action will move the staff name under “Members.”
- Save. Upon saving, you will be taken back to the Group Assignment list.
Note: You can change the Target Object by selecting the “Group” button in the right side of the window.
If you do not see a specific member when trying to add to the group, ensure the User License Type setting has been created. See Creating your Group Assignment Custom Settings.
Follow the migration steps to move your new groups from one Org to another.
Back to Implementing/Configuring Group Assignments