Creating Auto Responders
Overview
Auto Responders are messages automatically sent to students once they complete an interaction, e.g., a confirmation text is sent to the student after they submit the inquiry form.
There are three types of Auto Responders: Email, Text, and Voice.
Auto Responders can be tied to Inquiry and SEM forms, Event registration forms, Custom forms, or Student Creation.
Creating Auto Responders
- Click Account in the top navigation bar, then select EMP Settings.
- Click Auto Responder in the side navigation, then the Auto Responders drop-down menu. Select the type of auto responder you want to create.
- Complete the prompts and Save.
To edit the auto responder, click the edit pencil.
To delete an auto responder, click the trash icon. If you delete an auto responder, it will no longer send, even if it is connected to any forms or events.
Applying Auto Responders
After creating an auto responder, it must be added to the form or event before it is sent.
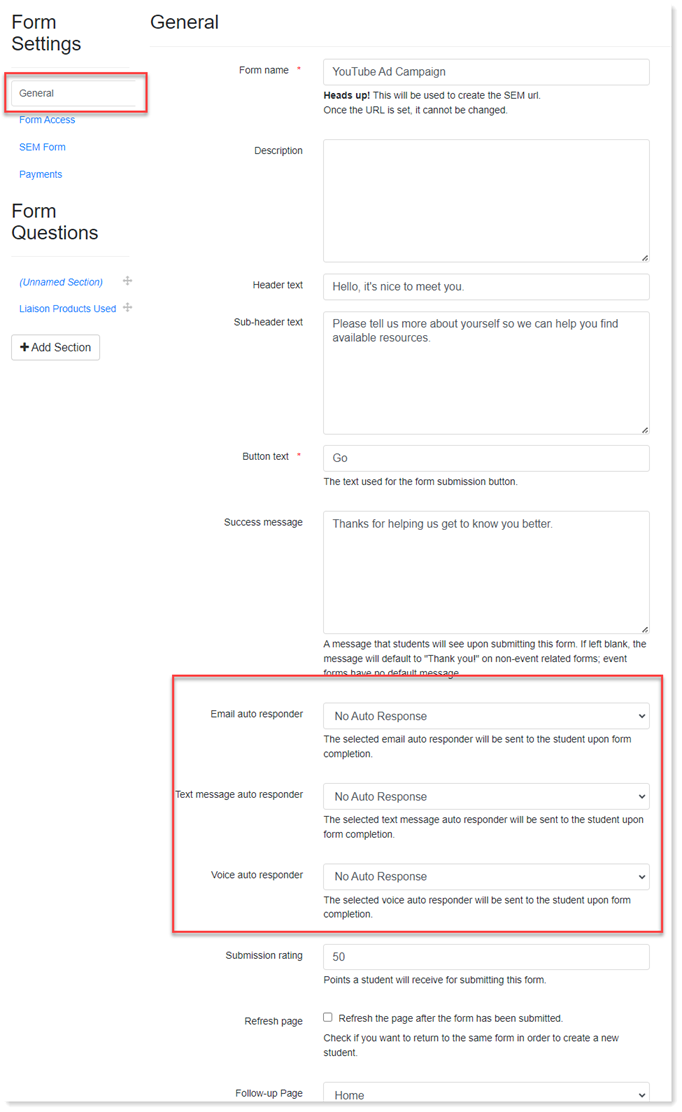
Forms
- Navigate to the Form and create a new Form, or click the edit pencil to open the form for editing.
- Under Form Settings, click the General section.
- Select the Auto Responder from the drop-down menu and Save.
Events
- Navigate to the Calendar. Create a new event or click the edit pencil to open the event for editing.
- Under Form Settings, click the General section.
- Select the Auto Responder from the drop-down menu and Save.