Online Application Best Practices
Best Practices for Online Application and Decision Processes
- When creating Checklist items, do not include items that are already collected within the Online Application. Checklist items are strictly intended for post-submission items such as Recommendations. Essays and Application Fees are examples of items that are collected pre-application submission.
- End users should NOT make changes to Checklist item records; they should update the actual record that fulfills the requirement/checklist. This allows the Application Requirements Manager to function properly and prevents errors.
- Do not make edits to Application Review records outside of the Application Reader. Use the Read Application button on the Application Review record and make all updates through the Application Review Reader. Required score fields that are important to the automation and process could be missed.
Best Practices for the Setup and Testing of Application Snapshots
Before you Begin
Before you begin, we recommend testing in a Partial sandbox (with a maximum of 10,000 application records) or a Developer sandbox (Note: You must load your application records and Attachments).
Suppose you only have access to test in a Full sandbox. In that case, we recommend limiting the number of application records that generate snapshots to 10,000 (using data loader or some other means).
Criteria
The criteria for generating Application Snapshots are as follows:
Option 1: PDF Snapshot WITHOUT Attachments
To Generate PDF Snapshots without attachments on Application Stage Submitted:
Any Application (TargetX_SRMb_Application_c) records where the following criteria are met:
- Application Stage (TargetX_SRMb_Stage_c) = Submitted AND
- Application Process (Application_Process__c) is not blank AND
- Has an Attachment with the name application.json AND
- It does not have an Attachment with the name ApplicationSnapshot.pdf
Option 2: PDF Snapshot WITH Attachments
To Generate PDF Snapshots with attachments on Application Status change:
Any "Application" (TargetX_SRMb_Application_c) records where the following criteria are met:
- Application Status (TargetX_SRMb_Status_c) = the value selected in Application Status to trigger PDF Snapshot with attachments AND
- Application Process (Application_Process__c) is not blank AND
- Has an Attachment with the name application.json AND
- Does not have an Attachment with the name ApplicationSnapshotWithAttachments.pdf
Reporting
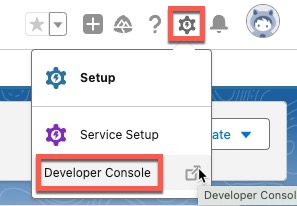
Salesforce has limited options for reporting on Attachment records. The following queries can be run in Dev Console to get an "upper bound" of the number of snapshots that can be generated if the service is enabled:
You can access the Developer Console from the Setup icon:
Total number of Application Records with application.json attachments:
SELECT Count(Id)
FROM Attachment
WHERE Name = 'application.json'
Total number of applications that meet the non-attachment criteria for Option 1:
SELECT Count(Id)
FROM TargetX_SRMb__Application__c
WHERE TargetX_SRMb__Stage__c = 'Submitted' AND
TargetX_App__Application_Process__c <> ''
Total number of applications that meet the non-attachment criteria for Option 2:
The status value is variable depending on the status selected on the Settings page and will need to be updated accordingly
SELECT Count(Id)
FROM TargetX_SRMb__Application__c
WHERE TargetX_SRMb__Status__c = 'Complete - Pending Review' AND
TargetX_App__Application_Process__c <> ''
Best Practices in dealing with Spam bots and manually submitted fake applications
Spam bots can create accounts using your Online Application, resulting in numerous invalid records in your Org. If you've already been hit by a Spam bot, you can clean up the invalid records manually; or, if a large number of records were created, use a data tool, such as Informatica, to mass-delete the invalid records.
Best Practices to prevent Spam bots from infiltrating your system:
- Upgrade to at least the December' 1'19elease - this release contains an update to CAPTCHA, which will prevent spam bots from bypassing the CAPTCHA feature.
- Enable CAPTCHA.
- Create a Validation Rule to prevent spam records from being created
Validation Rule
If your spam attack is characterized by records being created that all have an email address ending in qq.com, a validation rule should prevent the spam records from being created.
This is a bit of a brute-force approach to preventing spam bot attacks. Remember that Validation Rules are not a perfect solution but are a helpful stop-gap measure while you work to implement CAPTCHA.
Create two identical rules:
- One on the User object
- One on the Contact object.
- Go to Setup and search for Object Manager.
- Locate the User or Contact(Student) object and click Validation Rules.
- Click New.
- Create a rule matching the following on each object:
- Rule Name = <client defined>, such as 'NoQQdotcomUsers'
- Error Condition Formula = CONTAINS(Email, "@qq.com")
- Error Message = <client defined>, such as 'New registrations are not currently being accepted from this email domain.'
- Error Location = Top of Page
- Save your changes.
- Repeat for each object (User, Contact/Student).
Note: This will prevent any legitimate students with a qq.com email from filling out an application. We recommend that you only implement this for a short time while you enable CAPTCHA.
Mass-delete invalid records
To clean up your data, you will want to use a data tool to do the following tasks:
- Set all spam User records to inactive by setting the values in the IsActive and IsPortalEnabled records to False.
- Run a report of created contacts and use a data tool or Informatica to delete the appropriate contact records.
Note: You will need to set the two validation rules to Inactive while performing these data cleanup tasks; you can reactivate them as soon as the data cleanup is complete.
If you don't have CAPTCHA enabled, we recommend doing so; the product solution in the December 19 release involves implementing CAPTCHA on your online application. Follow the instructions in the Knowledge article Configuring CAPTCHA for the Online Application.
Dealing with Fake Applications
In addition to Spam-bots, Manual spamming can occur when a user fills out and submits online applications manually with false information.
The most important part of dealing with Manual spamming of applications is asking "W" at does someone gain from this?" "nlike computer-generated spam apps that are always probing for vulnerabilities wherever they can find them (and are kept at bay by CAPTCHA), people will only create fake applications if they stand to benefit from them. Thus, the way to prevent fake applications is to make it harder for a spammer to get what they want. Generally speaking, spammers target schools that use an auto-admit system that gives them something tangible just for being admitted. Some examples of this we've seen in the past:
- Automatic .edu email address: .EDU addresses are valuable, largely for the free discounts many retailers and service providers apply to accounts created with or purchases made with such an address. Spammers will rapidly create apps to gather .edu email addresses and then either sell them or use them to buy products at a discount and resell them at full price.
- Automatic MS Office access: Some schools will also give access to the MS suite, which can be sold alongside the .EDU email.
- Automatic Financial Aid: Sometimes schools even distribute financial aid automatically based on admittance, which obviously is a target for someone trying to scam a school out of money.
In all these cases (and more) where something is gained for filling out an app, the answer is to revise business processes to remove the distribution of whatever is being targeted without a manual intervention or validation step. If spammers can't rapidly create the applications and receive whatever they're aiming for, the cost/benefit balance quickly swings away from them, and they will slow down or stop their attacks.
Suggested Updates to Business Processes
Below are suggested updates for manual verification that you can make to your business processes to minimize the impact of Manual Spamming. These options will require you to update any Automated Auto-Accept workflows you currently have in place and manually verify new applications before any workflows are triggered.
Please be aware these changes will also affect your ‘real’ applicants. You’ll need to audit your Application emails to ensure applicants have the appropriate information based on your updated process.
Option 1: Create a checkbox on the Application object to be checked when an application has been manually verified.
- This would require you to update your workflow(s) to include this checkbox in your filter (where the checkbox is unchecked) - True, False
Option 2: Create a separate Application Status or another custom field picklist value.
- This would require you to update your workflow to trigger off of the new picklist value.
Option 3: You can do a combination of Options 1 and 2. In this case, your workflow would trigger when the checkbox and new picklist value have been updated.
- This would require you to update your workflow(s) to look for the new checkbox [unchecked] and then trigger off of the specific picklist value [Accepted].
Manual Verification
Suggestions on what to look for when manually verifying applications:
- Look for duplicate values on same-day applications, such as:
- Emails
- Addresses
- Birthdates
Note: The most common cases of manual spamming Applications occur on the same day.
Other recommendations:
- Consider charging an Application Fee
- Do not include the .edu email address in your Acceptance process. You can share this after you have verified the applicant’s intent to matriculate.
Setting up the TargetX Online Application and/or Portal after refreshing a Sandbox
This article assumes the sandbox was recently refreshed and/or created from a production environment where the Online Application is installed and configured and need to ensure it can be used and tested fully in the sandbox. This article does not provide instructions on creating a new application in the sandbox. If you are testing Application Snapshots, please review this article for Best Practices: Best Practices for the Setup and Testing of Application Snapshots.
Updating the Community Theme Related Site
Community Theme records are used in the Online Application and Portal to control the branding (aka look and feel). The Community Theme record is associated to a specific Community Site URL by way of the "Related Site" record, which supports different branding for each community. After a sandbox is created and/or refreshed, the Related Site URL must be updated on the sandbox's Community Theme record to ensure you can log-in correctly to the Online Application in the sandbox. Use the following steps for both your Online Application and Portal site(s).
- Click on Setup and search for Digital Experiences (formerly All Communities), select All Sites. Find your Online Application and/or Portal Community Site URL and record the secure site URL (including any suffix)
Example: https://targetxuniversity.force.com/onlineapplication
Click the Apps menu and search for Community Themes:
Click the Theme Name of your Online Application's Community Theme record to view the details. This may be the "Default" record or a custom-named record. Click the Related tab. In the "Related Sites" listing, click Edit to update the URL.Note: Make sure that your Related Sites URL includes https.
Replace the "Base URL" with the Community Site URL you obtained in Step 3 above. Click Save Repeat the above steps for any/all communities actively being used.Reset Captcha keys
When a Sandbox is refreshed, the Captcha keys have to be reset to test the online app. Refer to the article: Configuring CAPTCHA for the Online Application, for directions on how to register Captcha keys and enter them into the CAPTCHA setup.
Update the Recommendation Email Template
Update the recommendation email template to the application site URL from your production URL:
- Navigate to Setup and search for Classic Email Templates.
- From Folder, select Recommendation Emails.
- Edit the Recommendation Request with your Application Site URL.
- Save your changes.
Notes:
- Email deliverability needs to be turned on to test Recommendations.
- When Email Deliverability is turned on, automated email alerts in workflows, process builder, flow, or custom triggers could trigger emails to the student records in your sandbox environment.
We recommend you deactivate any workflows or processes while testing the recommendations with the application in Sandbox OR Create an Informatica process that updates email addresses for all existing contacts in the system after a refresh. This will ensure that only test records created in the sandbox will have valid email addresses, and students won't accidentally get emails.
Updating the Community Default Account
These instructions are for orgs not using EDA Administrative Accounts and sandboxes that are NOT a FULL copy.
Update the Default Account Id in your TX_CommunitiesSelfRegController apex class:
Click on Setup and search for Apex Classes. Find the TX_CommunitiesSelfRegController apex class Look for a line that contains defaultAccountId =- If your apex class contains defaultAccountId = null; then you can skip the next step and update the Account in your Community settings.
- If the line in your apex class looks like this defaultAccountId = '001F0000012OWEgIAO'; then confirm the Account Id from your apex class exists in your org. If the Account does not exist, update the Id to a new default Account Id.
Update the Account in your Community settings:
Click on Setup and search for Digital Experiences (formerly All Communities), select All Sites. Click Workspaces next to the Community you need to update. Go to Administration. Go to the Login & Registration tab Scroll down to the Registration Page Configuration section and verify the Account lookup is populated with the Account you want new Contacts assigned to upon registration.What happens if I don't update the Community Theme Related Site?
When the above steps are not completed, you may see unexpected log-in or landing pages when accessing the Online Application and/or the Portal. For example, a school with an Undergraduate Online Application site and a Graduate Online Application site may find that the sandbox uses the Undergraduate log-in for all contacts even when logging in as a Graduate Student.
Note: In some cases, you may need to update Sharing Rules as some Sandboxes will change the Create By to Owner as <null> or <TargetX Base>.
Navigate to Setup and search for Sharing Settings. In the Manage sharing settings for field, select Community Theme. In the Community Theme Sharing Rules section, review/edit the Sharing rules to ensure that Created By is populated correctly. Save your changes.Why am I seeing an "Oops" message when logging into the community?
The Oops message is a default error message provided as part of the TargetX Portal. There are two reasons why you may see an "Oops" message on your Community.
If no Portal page is published, the Oops error will appear. You will want to confirm you have published a portal page:- Click on "+" to access all tabs
- Click on the TargetX Builder (or X-Builder) tab
- Click on the Portal Builder widget
- Confirm your Community has a Portal page record listed and marked as published. If not, publish a page or contact TargetX Support for assistance.
Note: Although set as the default, the Community Theme will not be used for all community sites, assuming you have also created a Related Site record. The Related Site determines which Community Theme record is used on which community.