The Student Record Page
Overview
The Student Record Page contains comprehensive information about a specific student, such as:
- Timeline: the student's interaction history.
- Information: contact information, interests, campus preferences, etc.
- Checklists: completed items on all checklists.
- Registered Events: event registration and attendance history.
- Note: if you do not have the EMP event module, event history is not included on the Student Record Page.
- Communications: email, text, voice, and print communication history.
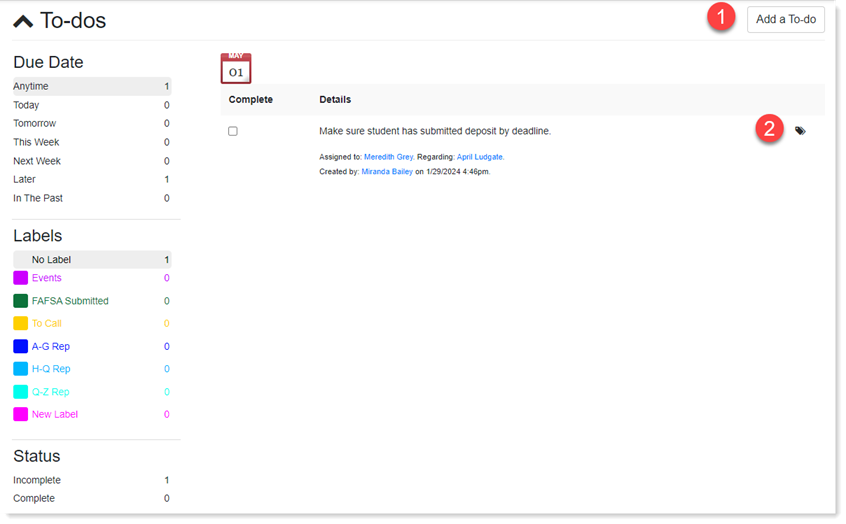
- To-do's: rep reminders or tasks for the student.
- Notes: comments recorded regarding the student.
- Groups: a list of groups the student is a part of.
Timeline

- Click the menu bar to jump to that section of the student record page.
- Click the Actions drop-down to perform a selected action on the student, such as a stage change, entry year change, impersonate student, etc.
- Toggle between Graph view and List view.
- Click an icon to isolate specific information on the timeline. For example, to only see source history, click the folder icon. Place your cursor over an icon to view its functionality.
Information
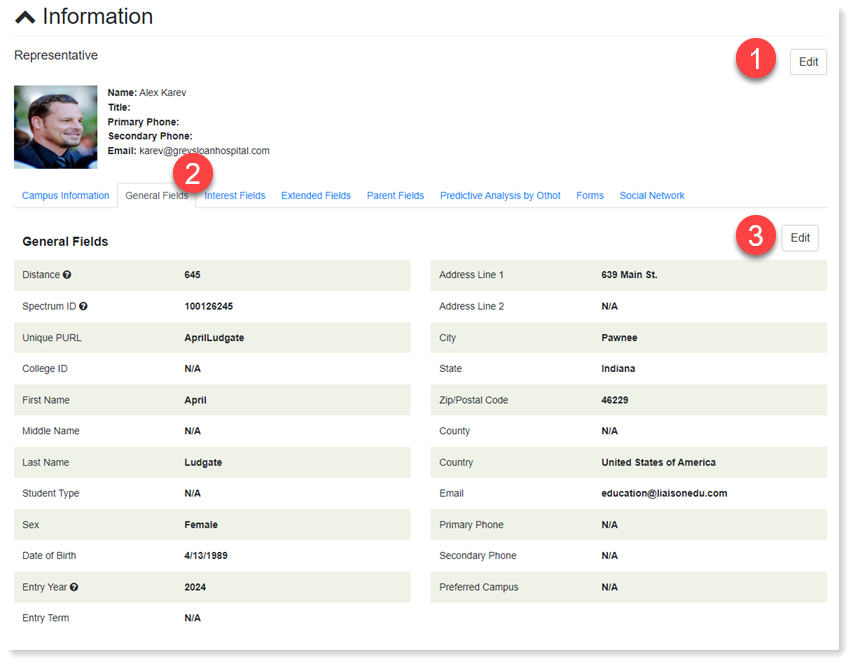
- Manually edit the student's representative.
- Click a tab to toggle between data sections.
- Click Edit, and then the edit pencil to update a student's information.
Checklists
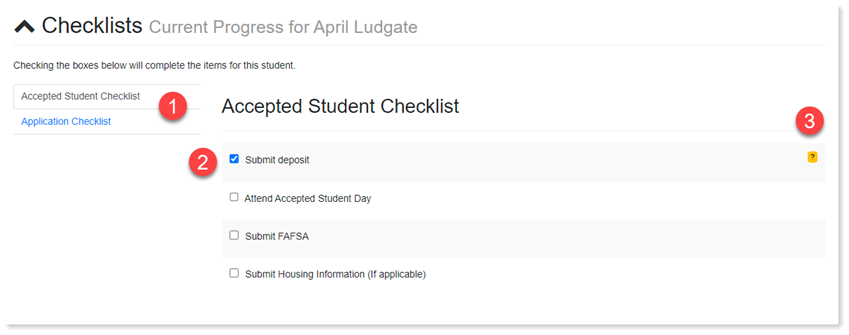
- List of all checklists created in your EMP instance. Click a tab to toggle between lists.
- Itemized list. Completed items are indicated by a blue checkmark.
- A yellow question mark indicates manual completion of an item by a representative in EMP, while items marked as completed by the student on the PURL do not display this yellow indicator.
Registered Events

- Click Sync Webinar Attendance to individually transfer registration attendance from GoToWebinar to EMP. Click Register Student to manually register a student for an event.
- Manually mark a student as "checked-in" for an event. Click Details to view their registration information.
- Click the edit pencil to manually update registration information. Click the delete icon to remove a registration.
Communications
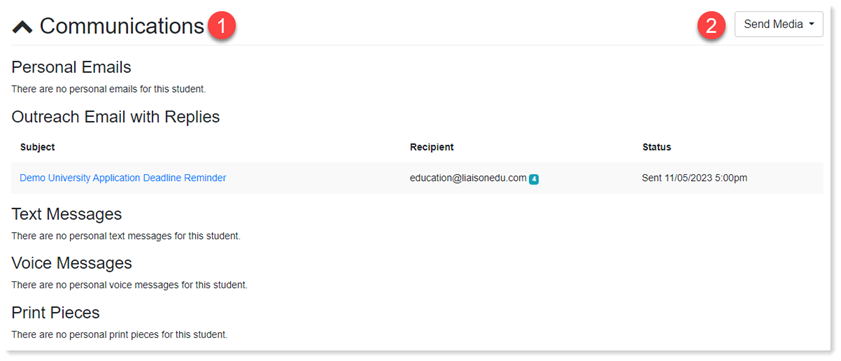
- Comprehensive list of any communication sent to a student from EMP.
- Send a personal email to a student through EMP.
To-do's
Notes
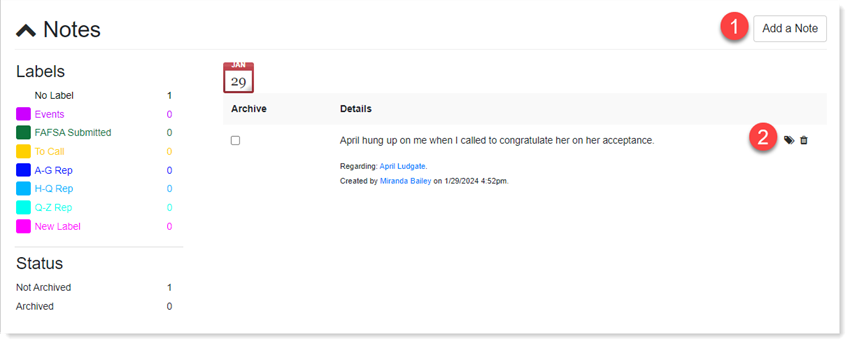
- Click Add a Note to include an internal memo on the student record page.
- Add a label to the note.
Groups
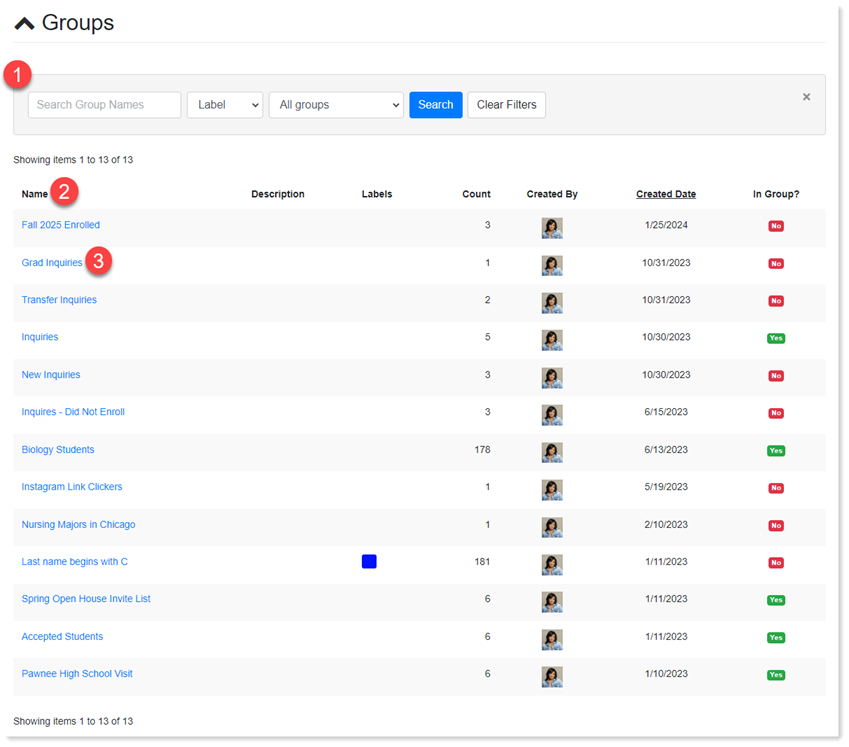
- Use the filters to search for a specific group.
- Click the column title to sort the information.
- Click a group to see every student in the group.
Accessing a Student Record
You can access a student record in two ways:
- Student List
- Student Search bar
Student List
- Click Students in the top navigation bar, then select Students from the drop-down.
- Click Filter List and use the prompts to find students who meet your desired criteria.
Student Search Bar
- Navigate to the search bar and enter the student's name, email address, city, etc. On the next page, a list of students appears of all possible matches.
- Use Advanced Search for additional filters to narrow down the list of students.
- Click any row in the search results for basic information about the student.
- Click the student name to navigate to their student record page.