Quick Start Guide for Administrators
Overview
Welcome to Outcomes, a cloud-based application management and enterprise solution that provides users with tools to streamline their admissions processes. Using Outcomes, you can:
- Manage applications as they progress through the admissions cycle.
- Obtain holistic views of application pools.
- Create reports using application and contact data.
- Communicate with applicants and contacts.
Note that the video above refers to the software by its former name, Admissions by Liaison.
Create an Account for New Users
- Go to the Organization section of the Settings menu and click Users.
- On the Users page, you can review your existing users. Click the plus sign at the top right to add a new user.
- Enter the new user’s name and email address, and select the desired Role for your new user. By default, there is an Administrator role that gives full access to the software. All other Roles need to be created in the Roles area.
- If you don't want the user to receive notifications regarding review assignments that have been given to them, enable the Opt out of assignment summary emails option.
- If your program works with the Events feature in Outcomes, and you'd like the user to receive notifications about event registration changes, enable the Opt into event registration emails.
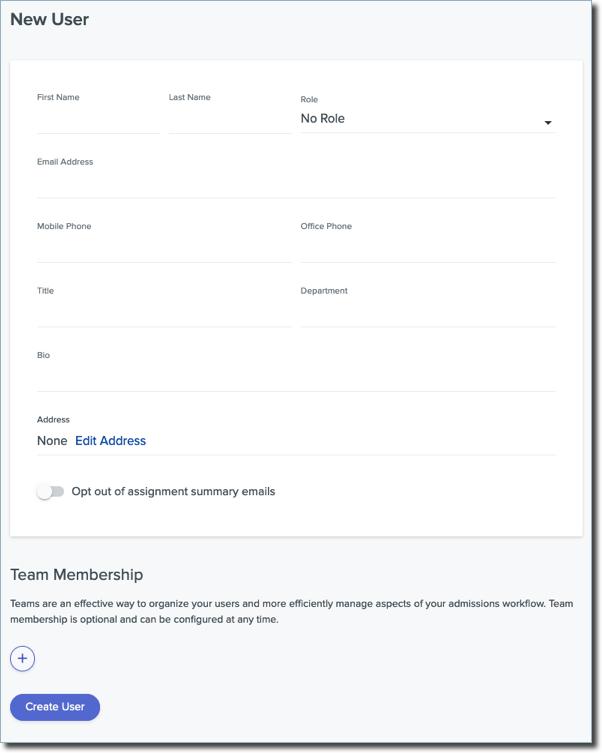
- If applicable, in the Team Membership area, click the plus sign to search for and select the teams you’d like to add the user to. You can select any previously created team. You can also create and manage teams separately by clicking Teams in the Organization section of the Settings Menu.

- Click Create User.
- If you selected a Role for the user, you’re now presented with a Portals area that allows you to indicate which portal the user will be invited to. This allows you to distinguish access to Outcomes, the Reviewer Portal, or other portals, where applicable. Use the toggle to enable access to a portal.

- When you enable access, the status changes to Not Invited. Use the envelope icon to send the user an email invitation. Once the invite is sent, the status changes to Invited. Users who have not yet been invited are pending.
- Once the user accepts the invite, the status changes to Activated.
- Invitations expire after 90 days. To resend an invitation, return to the user's page and click Resend Invite from the Invites section.
Getting Started with the Essentials
Before you begin configuring Outcomes take some time to become familiar with the following:
|
Foundational Topic/Link |
This topic contains information on: |
|---|---|
|
The main areas of the Dashboard which can provide you with essential information. |
|
| 2. Navigating the Applications Grid | How to search, filter, and work with applications. |
|
How to access and navigate individual applications. |
|
| 4. Guide for former WebAdMIT Users | How to relate the features in Outcomes with the features in WebAdMIT. This can be useful if you're migrating from that platform. |
Configuring Outcomes
Outcomes is a powerful tool that can be configured according to your admissions process. Once you become familiar with the basics noted above, review the following administrative functions:
|
Administrative Topic/Link |
This topic contains information on: |
|---|---|
|
How to set up and manage your Outcomes users and their permissions. |
|
|
How to create and manage Phases, which are categorizations that help you keep track of where each application stands in your process. |
|
|
How to create groups of applications based on the criteria of your choice, allowing you to perform time-saving batch actions. |
|
| 4. Customizing the Dashboard | How to customize what appears on the Dashboard for you and other users. |
| 5. Customizing the Application Summary and Sidebar | How to select fields to include in prominent areas of the application for quick access to important information. |
|
How to create and work with Tags, another way of categorizing your applications. |
|
|
How to create and assign Evaluation Forms for your reviewers to complete. |
|
| 8. Working with Exports | How to create and generate Export files, which can be produced in various formats. |
Additional Resources
The Outcomes Help Center contains a broad range of searchable topics, including the following:
- Working as an Administrator
- Reviewing Applications
- Working with Contacts
- Working with the Marketing features
Release Notes
Release Notes are monthly summaries of enhancements and new features in the software. We recommend that you periodically review this information to stay up-to-date on the latest changes.