Resolving Common Online Application Errors
This guide helps you troubleshoot common errors in the TargetX Online Application process along with suggested resolutions.
Students can't create Accounts
Error: Students can't create Accounts and may receive the error 'Your request cannot be processed at this time. The Site Administrator has been alerted' and 'Insufficient Access'.
Resolution: This issue typically occurs due to an error in configuration with EDA. When new community users are created, a contact is created first, which also creates an Administrative Account for that contact. Salesforce requires that a community user's contact be associated with an account that is owned by a User with a Role.
If you have Flows that default to an Account owner, validate that the Account Owner has a Role.
All newly created Community Users are associated with a Contact. In order for the communities user creation process to work properly, it must match a newly created user to an existing contact. Verify that the Applicant meets the criteria below:
- the Contact must have an Account
- the Account must have an Owner and
- the Owner must have a Role
Users not receiving the Password creation email
Step 1: Navigate to Setup and search for Email Deliverability
If this is set to "System email only" you will need to be changed to All Email for the functionality to work.
Step 2: Navigate to Setup and search for Organization-Wide Addresses
Check to see if your org-wide email address is configured AND verified. You will need to verify this email for the email to send.
Welcome Email isn't sending for Portal/Community users
Ensure that your Community Email Settings are configured:
Validate the Email Templates for your Community: ![]()
Ensure that welcome emails are enabled for communities:
- Navigate to Setup and search for All Communities.
- Select the Manage link next to your Community.
- Select the Administration option in the left pane and then Emails.
- Check the Send Welcome Email option in the “Email Templates” section.
- Save your changes.
Students from certain countries are unable to log in
See Understanding why students can't log in from certain countries.
Can't see ALL Schools (Accounts) listed in the School Picker
Verify you have completed the steps outlined in Configuring the School Picker on your Form Assembly Form.
The user gets an error when attempting to enter a School
Error: Invalid Data. Review all error messages below to correct your data. Apex trigger Student_Master.EHMasterTrigger caused an unexpected exception, contact your administrator.
Resolution: The owner of the School (Account) record does not have a Role assign. Update the owner of the School (Account) record to be a User with a Role.
Errors when trying to make changes to a field on an Application
If you receive an error when attempting to update a field on an Application, such as Degree, it is likely because the change in Degree (or relevant field) may be firing more processes that can be completed in the given time.
The recommendation is to change the application back to In Progress from Submitted, Save, update the Degree (or relevant field), Save, and then return the Application to Submitted.
This will break apart any processes happening and avoid errors.
Students are unable to submit a payment
If a student attempts to submit a payment numerous times but is unable to submit, try these steps to correct the issue:
- Remove the irrelevant payment detail records:
- Navigate to the Student tab.
- Click on the Student having the issue.
- Click on Related.
- Locate the Payment Details related list.
- Delete any unsuccessful payments that were generated by the student's attempts.
- Save your changes.
- You should also ask the Applicant to clear their browser cache.
An error that 'something went wrong, check the console.'
This error is typically related to Permissions.
Resolution: Verify your Online Application Sharing rules, see Setting up Security for your Community.
Applicants select 'Pay Now' but aren't being directed to the Payment Vendor
If applicants are attempting to select Pay Now but are not being directed to the Payment Vendor, this is typically due to your Application Form not having the correct Payment Connector setup.
- Navigate to the Application Forms tab.
- Click on the Application Form Name that is not working properly.
- In the Details tab, verify that a Payment Connector is selected and configured properly.
- Save your changes.
The student paid the Application Fee but the application not recognizing the payment
- Navigate to the Application record.
- Locate Payment Details section and confirm that a payment was recorded and successful.
- Once you've verified that the Payment WAS successful, navigate to the Application Detail section.
- Under the Fee Information section, verify that the Application Fee Payment Received checkbox has been checked. If this is NOT checked it will prevent the Application from seeing the payment and allowing the completion of the Application.
- Update the checkbox and Save your changes. The student should then be able to complete the submission of the application.
Online Application thinks a payment was not received when it was
If you use a Custom domain, you MUST use ‘secure’ in your URL.
For example:
https://myuniquecustomname.force.com/targetx_payment__responseHandler (Incorrect)
https://MyUniqueCustomName.secure.force.com/targetx_payment__responseHandler (Correct)
Blank cards are displayed in your Online Application
This typically occurs when you are using a Partial Sandbox, as only part of the records get copied. TargetX recommends testing in a FULL Sandbox whenever possible.
If you must use a partial sandbox, you can create a Sandbox Template to ensure all of the records you're trying to test are available.
Please see Salesforce Help & Training article on the different sandbox types and the Sandbox Templates Sandbox Types and Templates.
Error 'Issue Uploading File' when uploading Attachments
This error displays if you have Remoting set in your Online Application Settings, have not indicated a Max File Size for the attachment and the user uploaded a file larger than 3MB.
Resolution:
- Update your Online Application Settings to use API.
OR
- Add a Max File Size to the Application Form Attachments so that a specific error message will display to the user.
Error 'Attachment Upload Failed (5--Server Error)' when uploading Attachments
This occurs when the API Enabled permission is disabled and the API option in Application Settings is selected.
- After you’ve logged into your Org, add /apex/settings to the URL:
https://mysalesforceorg.com/apex/TargetX_App__Settings
This will display the following Settings page:
- If you have API Enabled for your Community User profiles, choose Remoting.
- Remoting does not require the API Enabled System Permission for the Community User Profile and has a file size limit of 3MB.
- Save your changes.
Validation error for TX CommunitiesSelfRegController
Error: 'Validation error for TX CommunitiesSelfRegController: Variable does not exist: TX FLSChk.'
Error ‘exceeded character limit’ in Online Application
The Application Form configuration is stored in the Configuration field on the Application Form object. This field has a character limit of 131,072. Once the Configuration field reaches the character limit, any additional configuration data will automatically be saved to Configuration Overflow 1, which also has a character limit of 131,072. Once the Configuration Overflow 1 field reaches the character limit, any additional configuration data will automatically be saved to Configuration Overflow 2, which also has a character limit of 131,072.
If all of these Configuration fields reach the character limit, you will not be able to save your Application Form due to an ‘exceeded character limit’ error.
Resolution: If this occurs, please contact TargetX Support for help with streamlining your application.
Users receive an error when trying to submit an Application
Error: Users receive an error when trying to submit an Application: "Error: Error occurred while loading a Visualforce page."
Resolution: This is typically caused by incorrect permissions. Run the TargetX Permission Scanner for the affected user to determine which permissions are missing.
Users receive the error 'Some error[] occurred while processing request, please try again.'
This error is typically related to Permissions. Run the TargetX Permission Scanner for the affected users to determine which permissions are missing.
Student can't change their Recommender
If a student previously submitted Recommendation details but is unable to change a Recommender, check the following items on the Student's Recommendation record:
- Is Disable Recommendation Form checked?
- This should be unchecked if a Student can change a recommender.
- Is the Recommendation Process field populated?
- This is the Recommender Response form that was configured for Recommender forms.
Issues with saving Recommender information in the Online Application
Error: Some error[] occurred while processing request, please try again.
Resolutions:
- Verify the Applicant's email address is populated in the Email field on Contact
- Does the application form associated with the students application have the Org Wide Email field populated with an email address that has been added to Setup > Organization-Wide Addresses?
- Is the Organization-Wide Address verified and available for your community user profile?
- If you aren't using an Org Wide Email, does the Contact's email show as bounced?
- Does your Community User profile have the appropriate object and field level permissions for the Recommendation object.
The recommender's Name is not displayed on the Checklist
See Why doesn't the Recommender's Name display on the Checklist?
Errors in the recommendation section of the application
Students are getting errors in the recommendation section of the application, such as 'invalid information entered.'
This problem often appears when access is missing on the Org-Wide Email address in Setup. Follow these steps to correct:
- Navigate to the Application Form that is generating the error.
- Make note of the Org-Wide Email address, or add one if none is listed.
- Make sure that the Org-Wide Email address has access to the System Administrator Profile:
- Navigate to Setup and search for Organization-Wide Addresses.
- Select the Edit button.
- Verify that either Allow All Profiles to Use this From Address is selected OR At a minimum, the ALLOWED PROFILES for the Org Wide Email must include the System Administrator profile.
Error creating Recommendation records in Sandbox
Error: "Some error[] occurred while processing request, please try again."
This issue is likely caused by your Sandbox Deliverability setting being configured as System Only. Recommendations will not be saved or sent when the Deliverability setting (found under Setup > Deliverability) is set to No Access or System Only.
Note: If you change this setting to All Email, please be aware that any automated emails will be sent when triggered.
If you prefer not to test the Recommendation feature, you can remove the Recommendation Request from the Sandbox Application Form. This will allow you to submit the application and continue with your testing.
Recommendation invitation link you clicked does not appear to be valid
Users receive the error 'The recommendation invitation link you clicked does not appear to be valid....'
This issue is usually due to incorrect permissions. To identify the missing permissions for the affected users, execute the TargetX Permission Scanner.
Percent symbol is not displaying correctly for Percent Complete
If the % Complete is displaying overlapped:
You can correct this using CSS in your Community Theme:
- Navigate to the Community Themes tab.
- Select to Edit the Theme you want to update.
- In the Custom CSS field, add the following:
body > div.targetx-dashboard > div.ng-scope > main > aside > page-navigator > div > div.targetx-application-percentage-container > div {
display: -webkit-box;
}
Decision letters not populating all fields
This can sometimes occur in certain browsers, such as Microsoft Edge.
Use a different browser, such as Google Chrome, to view the Decision Letter.
Recommendation Card on your Online Application produces an error in sandbox
For the Recommendation Card to function correctly and save as intended, Email Deliverability must be enabled within your Sandbox environment. It is important to note that emails may be dispatched to records if you have any actions triggered through Flows or by utilizing the Send Email button on a Student Contact record. This scenario is only relevant if your Sandbox contains student email addresses.
- Navigate to Setup and search for Deliverability.
- Access Level should be set to All Email.
- Save your changes.
If you would rather not evaluate the Recommendation feature, you have the option to eliminate the Recommendation Request from the Sandbox Application Form. This action will enable you to submit the application and proceed with your testing activities.
Application Snapshot is blank
This can occur if the JSON used to create the PDF has been corrupted. Follow these steps to re-create the pdf and/or json file:
You can re-generate the Snapshot by deleting the Snapshot PDF. This will prompt the Scheduled Job to create a new Snapshot.
View the next Scheduled Job by following these steps:
- Navigate to Setup and search for Scheduled Jobs.
- Locate the job TargetX Application Snapshot Batch.
- Make a note of the Next Schedule Run date/time.
Once the job runs again, the ApplicationSnapshot.pdf will be recreated. If it still does not display correctly, you can recreate the json by following these steps:
- Navigate to the Application that does not display the Snapshot correctly.
- Change Application Stage from Submitted to In Progress, noting the correct date in the Application Submitted Date field.
- Log in to the community as the Student and submit the application (no data was changed as it had already all been entered).
- Reset the App Submitted Date field to the original submission date.
This will refresh the .json file. Once complete, the ApplicationSnapshot.pdf will be recreated once the Scheduled Job runs again.
'Application Deadline has passed' when trying to submit the Supplemental Form
- Navigate to the Application record the applicant is trying to submit Supplemental information.
- Edit the record.
- Remove the value in the Deadline field.
- Save your changes.
- The applicant will now be able to submit the Supplemental form.
Removing the deadline AFTER the application is submitted disconnects the application, application form, and period deadline and allows the applicant to submit the supplemental form.
Supplemental Forms not displaying
Ensure you are using the proper version of Applicant Dashboard (v 17.20004 or higher)
- Navigate to Setup and search for Installed Packages
- Search for TargetX_Portal in the list.
- If you are on version 17.20004 or higher, proceed to the next item on this list.
- If you are on a version PRIOR to 17.20004, please see TargetX Upgrade Guides to upgrade to a more current version. At a minimum, you must upgrade to the Spring '17 Release.
Is the Application record at the Submitted Stage?
- The Application Stage must equal Submitted for Supplemental Forms to display.
Has the original application deadline passed?
- If the original Application Deadline has passed, applicants will not be able to view or submit Supplemental forms. See also:'Application Deadline has passed' message when trying to submit the Supplemental Form.
Is the Supplement Form field filled in on the Application records?
- The Application must have the Supplemental Form field populated:
- Navigate to the Application Form record for your Supplemental form.
- Verify the following fields are populated:
- Supplemental Button Text
- Supplemental Headline
- Supplemental Subtext
- Ensure the Supplemental Stage field on the Application object has 'In Progress' and 'Submitted' values:
- Navigate to Setup and select Object Manger.
- Locate the Application object.
- Click Fields & Relationships.
- Locate the Values section:
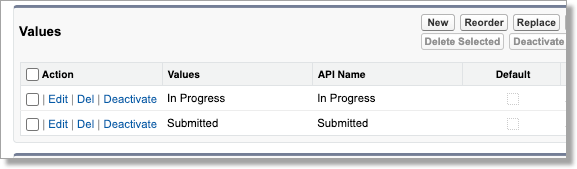
See also Configuring Supplemental Forms.