Configuring Recommendations
Configuring Recommender forms for an Online Application
Recommendations consist of multiple components:
- An Org-Wide email address.
- A Recommender Response form that the recommender will fill out.
- A Recommendation Email Template that will be used to send an email notification to the Recommender with a link to complete the Recommendation form.
- A Recommendation Request form which the Applicant will use to enter the name and contact information of the Recommender. This will link to the form flagged as a ‘Recommendation’.
- A Primary Application Form which will reference the Recommendation Request, completed by the Applicant.
Permissions
The student completing the application should be granted permissions for the Customer Community User profile. They must have read, create, edit, and delete permissions at the object level for recommendations; otherwise, the recommender's contact information will not be saved. To validate Field Level Security for the Customer Community User Profile, see Validating permissions for a Community User.
Permissions for the person making the recommendation on behalf of the student should be granted to the Guest Site User for the site unless you require the Recommender to log in. If log in is required, permissions should be granted on the Recommender Community User profile else the recommender's submission will not be saved. To validate Field Level Security for the Guest Site User, see: Validating permissions for a Site User.
For detailed information on Field Level Security, see: TargetX Permission Scanner.
Step 1: Configure an Org-Wide Email address 
- Navigate to Setup and search for Organization-Wide Addresses.
- Select the Add button.
- Enter a Display Name and Email Address.
- Select Allow All Profiles to Use this From Address.
- You will receive an email at the specified address and will need to verify the email address.
- Navigate to Setup and search for Deliverability.
- Set the Access Level to All Email.
- Save your changes.
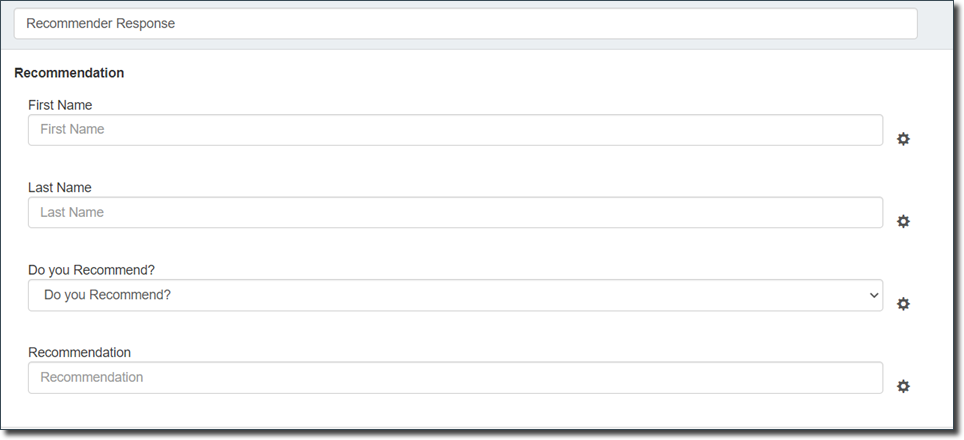
Step 2: Setup a Recommender Response Form
Create an Application Form that is flagged as a ‘Recommendation.’ This will be the form the recommender will complete.

- Create an Application Form.
- Enter an Application Form Name that will be descriptive enough to understand the type of recommendation (e.g., Employer Recommendation Response)
- Check the Recommendation checkbox.
- Specify the Org-Wide Email address you configured in the previous step.
- Save the Application Form.
- Select the Form Builder button.
- Add a new Section.
- Select the Recommendation card, which will be available on the left.
- Click the > to select the fields you want the Recommender to complete (such as Academic Achievement) as part of the Recommendation.

- Preview the Recommendation.
- Save the Recommendation.
Notes:
- Do NOT change a 'Checkbox' field to a Picklist field as it will produce unexpected results.
- If you are using picklist fields, the Value should match the valid picklist values set up in the TargetX aCRM.
Step 3: Setup an Email Template
Create a Recommendation Email Template that will be used to send an email notification to the Recommender with a link to complete the Recommendation Response form.
A Recommendation Request email template is included; you must enter your Application Site URL where it states [PUT SITE URL HERE]. You can further customize this template as needed. A Recommendation Email Template Folder from Email Templates contains basic templates for Recommendation requests. For details on creating emails, see the article Creating an HTML Email.
SAMPLE EMAIL TEMPLATE
Dear {!TargetX_SRMb__Recommendation__c.TargetX_SRMb__First_Name__c},
We would like to respectfully request a recommendation from you to support this application for admission to TargetX University.
Please click the Link below to complete or upload your recommendation.
Recommender Response=> https://[PUT YOUR SITE URL HERE]/TargetX_App__RecommendationForm2?id={!TargetX_SRMb__Recommendation__c.Id}&app={!TargetX_SRMb__Recommendation__c.TargetX_App__Recommendation_ProcessId__c}&hash={!TargetX_SRMb__Recommendation__c.TargetX_App__Link_Security_Hash__c}
Notes:
- The Documents tab must have a folder called "Email Image Library".
- The application form being used must have Recommendations added to the Page Layout from "Related Lists".
- See also: Salesforce.
Recommendation Reminders (for Applicant Dashboard ONLY)
- The ability to ‘nudge’ a recommender is only available for recommendations that have NOT been received.

- The following is required to view the Send reminder link:
- You must have Application Requirements configured for Recommendations. For details on setting up Requirement Rules, please see: Application Requirements Manager.
- The Checklist Item ‘Requirement Met By’ value must match the ‘Type’ value in the Recommendation record.
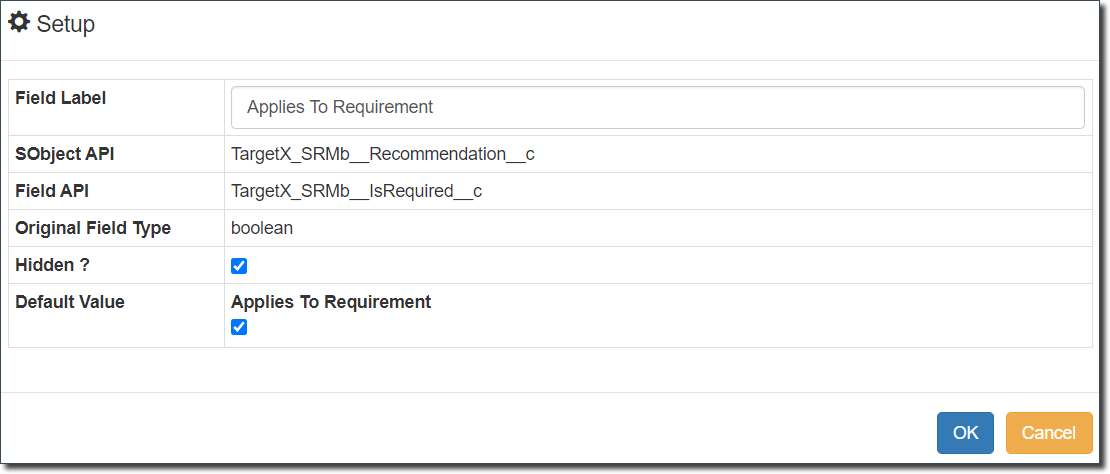
- When creating your Application Form, in the Recommendation section - include the “Applies to Requirement’ field as ‘hidden’ and set the Default Value to be checked. Set the card’s Filter Criteria to map to the “Type” field, storing the value that matches the “Requirement Met By” value.
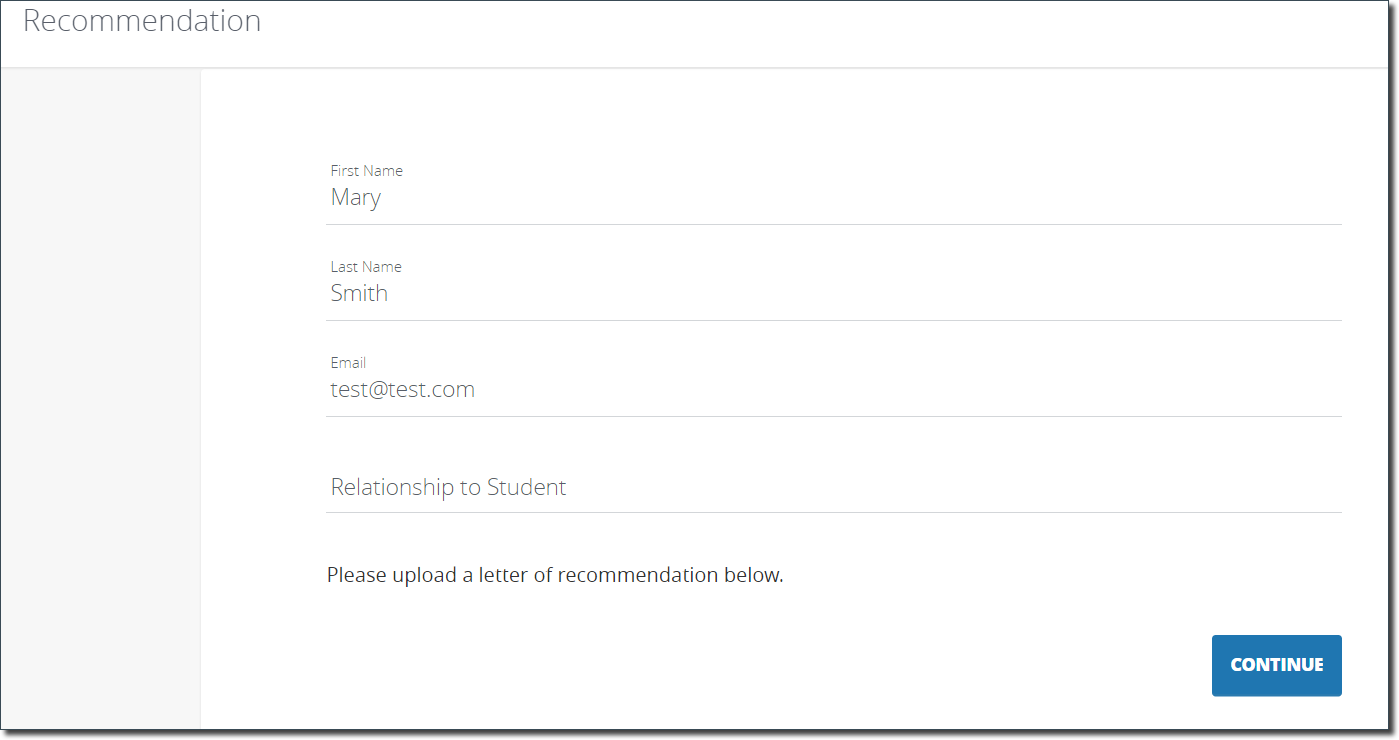
Step 4: Recommendation Request form
Create a Reusable Application Form which the Applicant will use to enter the name and contact information of the Recommender. This will link to the form flagged as a ‘Recommendation’.
- Select the Application Forms Tab.
- Select New.
- Specify the Application Type.
- Select the Reusable checkbox.
- Specify the Org-Wide Email address you configured in the previous step.
- Save the new Application Form.
- Click the Form Builder button
- Add a new Section to the form.
- Drag the Recommendation object into the new Section.
- Name the Section Recommendation Request.
- Add the following fields:
- Element - include instructions to the user, such as ‘Please provide the information of your recommender below. When you click Save, an email will be sent to your recommender.’
- First Name
- Last Name
- Type
- Applies to Requirement - set to Hidden and Applies to Requirement checked:
- Add any additional fields you would like the Recommender to complete.
- Click the gear icon on the Recommendation object.
- Select a Recommendation Form - this would be the Recommendation Response form you set up previously.
- Select an Email Template. This will be the email that goes to the Recommender.
- Click Ok.
- Save the form.
Step 5: Create the Primary Application Type/Form
Finally, you’ll need to create a ‘primary’ Application Type/Form that will include the Recommendation Request form created previously.
Note: When an applicant enters an email address for a Recommender, an email is sent out immediately to the Recommender. It is recommended that you add instructional text to the primary Application Form to alert applicants to this fact.
- Create a new Application Form.
- Specify the Org-Wide Email address you configured in the previous step.
- Save the form.
- Select the Form Builder button.
- Select the Reusable tab to display a list of the available Reusable forms.
- Scroll to or search for the Reusable Recommendation Request form you created previously and drag it onto your form.
- Select the Setup icon.
- Enter a label for the section (e.g. ‘Advisor Recommendation Request’).
- Select the Recommendation Form that will be used when a recommendation is submitted. This will be the Recommender Response form you created previously.
- Specify the Email Template that will be used to email the Recommender.
- Specify the Max Count - this is the maximum number of recommendations required.
- Specify the Min Count - this is the minimum number of recommendations required. If NO restrictions apply, enter 0.
- Indicate any Filter Criteria.
- Select Ok.
- Save the form.
Notes:
- Once an applicant submits an Application with a Recommender, the requirement status will display in the Community Portal. Applicants will then have the option to ‘Remind’ the Recommender and Change the Recommender. When an applicant changes the Recommender, it will remove the Checklist item, not the recommendation record.
- Recommendations can continue to be changed or submitted AFTER the Deadline.
Changing the recommendation 'Sender' email
The 'Sender' email for Recommendations is configured on the Application form, Org wide Email field.
If NO Org-wide Email Address has been defined on the Application Form record, the email will not send. You MUST populate a verified Org-Wide Email address.
The Org-Wide Email address comes from the Application Forms associated to the application record via the Application Process field:
- Recommender Response Form
- Recommendation Request Form
- Primary Application Type/Form
For details on configuring the above forms, see Configuring Recommender forms for an Online Application.
For details on message flows for Online Applications, see Online Application Message Flows.
Understanding how Applicants change a Recommender
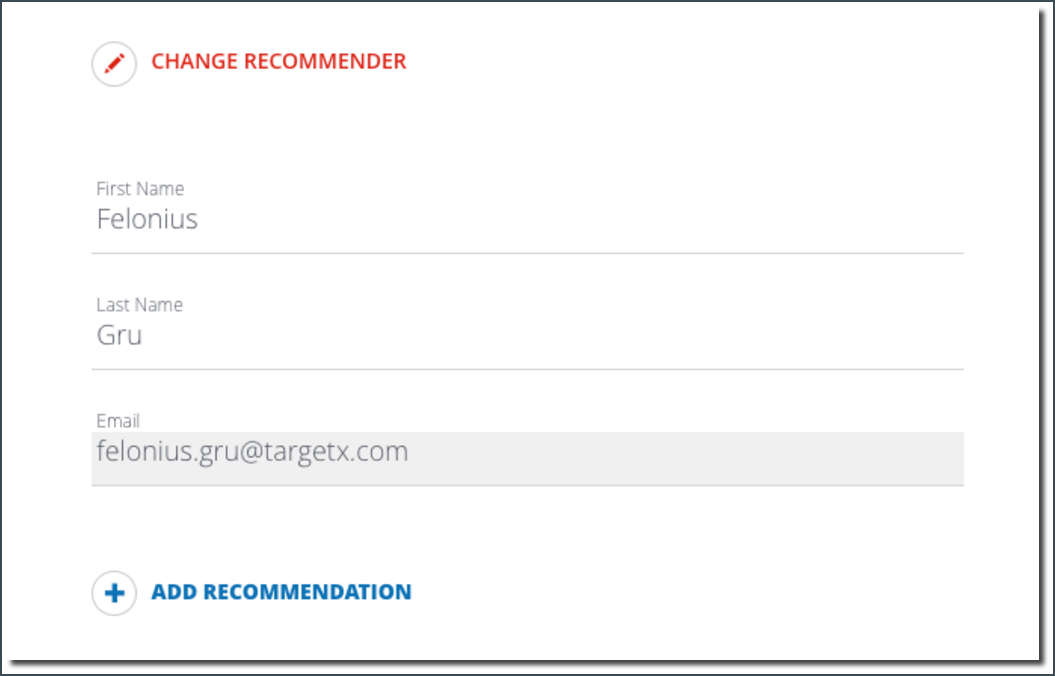
Applicants can change their Recommender in the Online Application, Applicant Dashboard and Portal if the recommender has not yet submitted his/her recommendation.
After a student enters and saves data for a recommender on his/her application, the fields are locked in a read-only state and cannot be edited. If a student wishes to later change a recommender's information or change the recommender entirely, he/she can do so as long as the recommendation has NOT been submitted. Students can also opt to remind a recommender.
- The applicant will see an option to click the Change Recommender button in the Application.
- Once clicked, a modal will display and the applicant must select Confirm, which will delete the previous recommender's information.
Note: If the previous recommender attempts to access the Recommendation Form, he/she will see the message "This Recommendation Form is no longer available."

- The Applicant can then enter the information for the new recommender, and the new recommender will receive the Recommender template email specified in your application configuration.
Note: If a recommendation has already been submitted, the applicant will see a notification of this in the application and cannot change the recommender's information.
Changing a Recommender after Submitting the Application
After submitting the application, a student can change his/her recommender information from the Applicant Dashboard or Portal, as long as the recommendation has NOT been submitted.
Note: You must be using both the TargetX Online Application and TargetX Application Requirements Manager to support changing a recommender after submission.
- The applicant will see an option to Change Recommender in the list of application checklist items.

- Once clicked, a modal will display and the applicant must select Continue
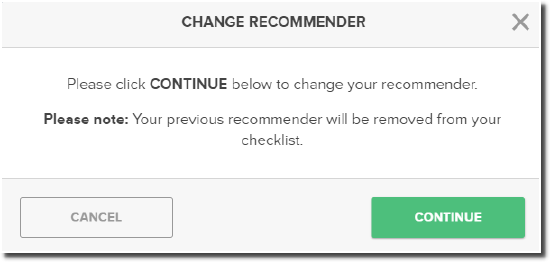
- The Applicant can then enter the information for the new recommender, and the new recommender will receive the Recommender template email specified in your application configuration.
Updating the Change Recommender button
You can update the Change Recommender button to read 'Save and Continue' using CSS on the Community Theme record.
DISCLAIMER: This CSS tag is not supported or maintained by TargetX, and is meant as an example of how you may choose to use CSS within our products. Some or all of the customizations these tags provide may change or no longer apply to your instance at any time. If at any time the CSS impedes expected functionality in the TargetX product, our recommendation will be for you to remove the CSS to regain functionality.
- Navigate to the Community Theme tab.
- In the Custom CSS field, enter the following:
.targetx-card-buttons .targetx-button:before {
content: "Save and ";
}


#card_p0_TargetX_SRMb__Recommendation__c1 > section > div > div.targetx-card-buttons.ng-scope > div > button {
font-size:0;
}


#card_p0_TargetX_SRMb__Recommendation__c1 > section > div > div.targetx-card-buttons.ng-scope > div > button:before {
content: "Save and Continue";
font-size:14px;
}
Understanding how Applicants remind a recommender
Once an application has been submitted, an Applicant may want to remind a Recommender to complete their recommendation. The Send Reminder link is available in Applicant Dashboard or Portal. The ability to send a reminder or ‘nudge’ a recommender is only available for recommendations that have NOT been received.
- The following is required to view the Send reminder link:
- You must have Application Requirements configured for Recommendations. For details on setting up Requirement Rules, please see: Application Requirements Manager.
- The Checklist Item ‘Requirement Met By’ value must match the ‘Type’ value in the Recommendation record.
- When creating your Application Form, in the Recommendation section - include the “Applies to Requirement’ field as ‘hidden’ and set the Default Value to be checked. Set the card’s Filter Criteria to map to the “Type” field, storing the value that matches the “Requirement Met By” value.
Implementing Recommender Communities
Recommenders can be authenticated into a Community if you wish for them to be able to manage multiple recommendations or to view Application snapshots (optional setting). Administrators will create a Portal that includes the Recommendation widget and any instructions or additional information for your Recommenders.
Before you Begin
In order to use Recommender Communities, there is an assumption that you already have:
- Configured Recommendation forms for your Online Application. For information on setting up Recommendations for your Online Applications, see Configuring Recommender forms for an Online Application.
- Your Online Application Community has been configured
- The Online Application Site User has been assigned the TX Online Application (Site User) permission set.
- Your Org has Portal enabled.
Step 1: Create a Recommender Community User Profile
Begin by creating a new Profile with the User License = Customer Community Plus and add the permissions outlined in the Permission Viewer as follows:
- Navigate to Setup and search for Profiles.
- Click New Profile.
- Select an Existing Profile to copy for the new Profile.
- Enter a Profile Name, such as Recommender Community Profile.
- Add the permissions outlined in the Permission Viewer for Portal.
- Add the permissions outlined in the Permission Viewer for Online Application (Recommender Community User).
- Save your changes.
Step 2: Create a Contact Sharing Rule
Create a Contact Sharing Rule with Read/Write access:
- Navigate to Setup and search for Sharing Settings.
- In Managed sharing settings for, select Contacts.
- Under Sharing Rules > Contacts Sharing Rules, select New.
- In the Step 1: Rule Name, enter Label = RecShare. The Rule Name will automatically populate with this value.
- In Step 2: Select your rule type, select the radio button option Based on record owner.
- In Step 3: Select which records to be shared > Contact: owned by members of, select All Internal Users.
- In Step 4: Select the users to share with > Share with, select All Customer Portal Users.
- In Step 5: Select the level of access for the users > Contact Access, select Read/Write.
- Select Save.
Step 3: Create/Update Email Templates
- Navigate to Setup and search for Classic Email Templates.
- Click on the email you use for Recommendation requests such as Recommendation Request.
- Click Edit.
- Include a line on the email template for New Users, referencing the TX_ForgotPassword page so that new users can create a password to log in to the Recommender community.
For example:
Hi {!TargetX_SRMb__Recommendation__c.TargetX_SRMb__First_Name__c},
Please provide your feedback https://[Site URL]/OnlineApp/TargetX_App__RecommendationForm2?id={!TargetX_SRMb__Recommendation__c.Id}&app={!TargetX_SRMb__Recommendation__c.TargetX_App__Recommendation_ProcessId__c}&hash={!TargetX_SRMb__Recommendation__c.TargetX_App__Link_Security_Hash__c}
New user url:
https://[Site URL]/recommend/apex/TX_ForgotPassword
- Save your changes.
Note: You can include the link to the "Forgot Password" page (<BASEURL>/<SITEPREFIX>/TX_ForgotPassword) for new Recommender community users to prompt them to set up their password.
Step 4: Update Online Application Recommendation Form(s)
Recommenders can be added as Community Users by checking the Create Community User checkbox in your Application Form:
- Navigate to the Application Form Tab.
- Select the Application Form you wish to update.
- Click the Form Builder option from the picklist.
- Click on the Recommendation card.
- Click on the gear icon at the top right.
- Click the Create Community User checkbox.
- When checked, you must enter a Community User Profile or a Community User Permission Set.
- When Create Community User is checked, the system will:
- Create a User for added recommender when the recommendation record has been saved on that card (requires email address).
- If only email address is included on the card, the lastname will populate with the email address.
- Assign the Profile to the User selected in Recommendation card settings.
- If the User record already exists, add the permission set to grant access to the community.
- If the User record already exists, the system will add a permission set to grant access to the community.
- Adds time zone of running User.
- Create a User for added recommender when the recommendation record has been saved on that card (requires email address).
- If you want to enable Contact matching for the creation of Community Users, click the Enable Contact Matching checkbox.
Note: The profile used to access the community must have read/create/edit/delete permissions at object level for Recommendations, else the recommender's submission will not be saved. For detailed information on Field Level Security, see: TargetX Permission Scanner.
Step 5: Configure a new Recommender Community
5.1 Create Community
- Navigate to Setup and search for Digital Experiences (formerly All Communities).
- Click New.
- Select Template = Salesforce Tabs + Visualforce
- Click Get Started.
- Enter the Name for your Community, such as Recommender Community.
- Enter a URL, such as recommendations.
- Click Create.
- Once the Community is created (this may take a few minutes), you’ll be directed to the Workspace.
5.2 Configure Community Members
- Click the Administration tile.
- Add the Profiles/Permission sets you previously assigned to your Recommendation users:
- Click Members in the left pane.
- Add the Recommendation User Profile you created.
- Add the TX Online Application (Recommender Community User) Permission Set and the TX Portal permission set.
- Save your changes.
5.3 Configure Login & Registration
- Under the Administration tab on the left, select Login & Registration.
- Under Login, select VisualForce Page.
- Select the TX_CommunitiesLogin Visualforce page for your login page
- Under the Password section
- Under Forgot Password select Visual Force Page.
- Select TX_ForgotPassword.
- Under Change Password select Visual Force Page.
- Select TX_ChangePassword.
- Select Save.
5.4 Configure Community Emails
- Select Administration > Emails.
- Enter Sender information along with an appropriate Org-wide Email address.
Note: Email address will default to the email of the user who created the community. Edit the email address to the appropriate value such as an org wide email address for admissions, etc.
- UNCHECK the Send Welcome Email checkbox.
- Save your changes.
- Select Administration > Pages
- For Community Home, select Visualforce Page and then select TargetX_Base__Portal.
- Save your changes.
5.5 Activate your Recommender Community
- Select the Administration tile.
- Click Settings in the left pane.
- Click Activate.
Step 6: Create a Community Theme
- Navigate to the Community Themes tab.
- Select New.
- Enter a Theme Name, such as Recommenders Portal.
- For the Template Name, enter: c__TX_CommunitiesTemplate
- If you have multiple communities, the template must be unique. Clone the TX_CommunitiesTemplate VisualForce page, give it a unique name, and enter that name with the “c__” prefix in this field.
- For the Static Resource, enter: TargetX_App__NewResource
- Set the Homepage to: TargetX_Portal__PB
Note: If you don’t see the Home Page field, you may need to add it to your Page Layout.
- If you have multiple communities set up, you will need to specify Related Sites. Related Sites are the Communities that will use the selected Community Theme:
- In the Related Sites related list, select New Theme Site.
- Enter the following:
- Site = enter a descriptive name for the related site, for example: Recommend.
- Community Theme = This will default to the Community Theme you selected.
- Base URL = the URL of the site that will use this theme.
Note: If you are using Custom CSS, Guest Site Users will need access to Read the Custom CSS field.
Step 7: Create a new Portal
When you create your Portal, Include any announcements, messaging and the REC widget. For more information on the REC widget: Recommendation widget.
- Navigate to the TargetX Builder tab.
- Select the Portal Builder option.
- Click the + in the top right of the window. When you create a new Portal you will need to define the following information:
- Name (required) will display to your constituents when they navigate to the Portal.
- Description (required) is for internal use to describe the purpose of the Portal.
- Category is a picklist of values that allow you to order and group your Portals into common categories.
- Select Create to move to the next step to define your Portal Layout and content using widgets. Once your portal is created you’ll see it in the list of available portals. Click the icon to delete
, copy
or edit
the portal.
- Add the REC widget to your Portal.
Note: The Display Application Snapshot option on the REC widget will display a link to view a snapshot of the submitted application for the Applicant requesting recommendations. Be aware that the application will contain private information about the applicant.
- Publish the Portal to the Recommender Community you created earlier.
Notes:
- If the data on the application changes, the application snapshot is NOT updated. The data will be a snapshot of the application at the time of submission.
- After recommendations for a given year have been completed, you may want to disable previous recommendation forms in order to ensure that Recommenders only see the latest applicants. See Disabling a Recommendation.
Creating a Contact Sharing Rule for Recommenders
You need to create a Contact Sharing rule for Recommenders if you have the Sharing settings for "Contact" set to Private for "Default External Access."
- Go to Setup and search for Sharing Settings.
- In Managed sharing settings for , select “Contacts.”
- Under Sharing Rules > Contacts Sharing Rules, select New.
- In the Step 1: Rule Name, enter Label “RecShare”. The Rule Name will automatically populate with this value.
- In Step 2: Select your rule type, select the radio button option “Based on record owner.”
- In Step 3: Select which records to be shared > Contact: owned by members of, select “All Internal Users.”
- In Step 4: Select the users to share with > Share with, select “All Customer Portal Users.”
- In Step 5: Select the level of access for the users > Contact Access, select “Read/Write.”
- Select Save.
Understanding Contact matching for Recommenders
The system searches for Active Community Users where Email = email address entered.
- If found, a recommendation record is created
- If not found, search Contact object for Email address.
- If one found, Create Active Community User associated to this Contact. Create Recommendation record.
- If multiple are found, select the most recently modified Contact as the correct Contact. Create Active Community User associated to this Contact. Create Recommendation record.
- If not found, then User, Contact, and Recommendation records are created.
System searches for any Salesforce Users where Username = email address entered.
- If found, follow Active Community User logic above where Username will be unique from the matching Salesforce Username.
- If not found, follow Active Community User logic above.
To enable Contact Matching for Recommenders
- Navigate to Application Forms and select your Recommendation Application Form.
- Click on the Recommendation card to view the details.
- Click the gear icon.
- Check the box for Enable Contact Matching.
- Save and Publish your form.
Delaying Recommender Response emails until AFTER a student submits their application
You can update Application Forms to Send After Submit for specific Application forms:
- Navigate to the Application Forms tab.
- Click the form you wish to send a Recommendation Response email AFTER submission of the Application.
- In the Details tab, click the Send After Submit checkbox.
Note: If you don't see the Send After Submit field, your System Administrator must add it to your Page Layout.
Disabling a Recommendation
If you no longer want the recommendation to display to the Recommender, you can disable it by selecting the Disable Recommendation Form on the recommendation record.
- Navigate to the Application tab and select the application displaying the recommendation.
- Navigate to the Recommendations section of the Application.
- Select the Recommendation record and select Edit.
- Check the box for Disable Recommendation Form.
- Save your changes.
Note: A page notifying recommenders that the recommendation form is no longer available will display to recommenders navigating to a recommendation form that has been disabled. If the Portal REC widget is being used, any disabled recommendations will not display in the list.
If you don’t see the Disable Recommendation Form field, you’ll need to update your Page Layout:
- Navigate to Setup and select Object Manager.
- Click on the Recommendation object label name.
- Scroll to the “Page Layouts” section and select to Edit the Recommendation Layout.
- From the page layout palette, select the Fields group and then drag the Disable Recommendation Form field onto the page.
- Save your changes.