Application Forms Overview
The TargetX Online Application provides a fully customized, secure, and mobile-first online application for admission connected to the Student's record in the CRM. Students can apply via their computer or mobile device. Admins can utilize a user-friendly interface to configure the application and use conditional logic capable of handling complex branching logic to display only relevant questions to applicants.
 |
 |
In addition to creating forms, the TargetX Online Application can collect supplementary data and fees. By configuring the TargetX Payment Connector, your Online Application can collect both application fees and enrollment deposits as needed by your institution. The Online Application can be set up to allow applicants to upload supplemental forms, essays, or other documents. These documents are then associated directly with the TargetX CRM contact record, allowing easy reference.
Furthermore, applicants can enter reference information in the Online Application. References will receive an email prompting them to complete an online reference form and submit recommendations, including attachments. CRM users can also communicate with references, as their contact information gets stored with the application data.
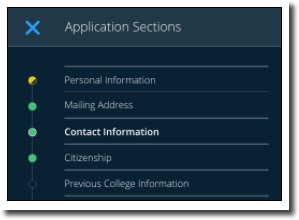
The Form Builder tool defines a form's fields and layout, while the App Configuration controls what applications are presented to users. A 'reusable' application form can be created and shared across all applications for data common across forms. For example, if most or all applications you plan to build contain a 'Contact Information' section, you can build a 'Reusable' Application Form with only those fields and use it in multiple Application Forms. This saves work when you are building applications and will make it easier to maintain and edit applications in the future.
Application Form Detail
The Application Form Detail view contains the basic information about your application. Once you've set up and saved an Application Form, the Form Builder and App Configuration buttons will be available to configure the various components of the application.
Note: The available fields are listed alphabetically.
- Allow Change Key Questions indicates if an applicant can change responses to Key Questions after they've started an application. If the applicant's updated responses to the key questions are associated with a new application form, that application form will load. The new application form will be related to the original application record created from the responses to the key questions, including all data entered before the applicant updates the key questions and the application form. The applicant can cancel and return to the original application if desired.
- Allow Mail-In Payment allows the applicant to select the option to mail their application payment yet still submit it online.
- Allow Waiver allows you to indicate if an applicant will be permitted to request a 'waiver' for the application fee when they encounter the 'Payment' step.
Note: The "Allow fee waiver" checkbox, when checked, will present the Student with the option to either pay online, or request a waiver. If the Student opts to request a waiver, they are then presented with an open text field that prompts them to specify the fee waiver request reason. The value they enter for the Fee Waiver Reason is saved in the Fee Waiver Description field in the CRM. Once the fee waiver is marked Approved (which can be done with workflow or trigger), the Student can submit their application.
- Amount sets the fee required to submit an Application. Leave this field blank if no fee is charged.
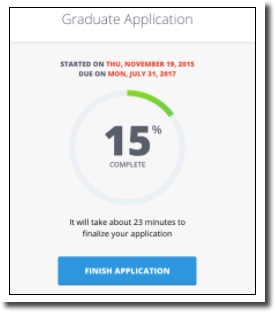
- Application Form Name is the name presented to the Student on the Rail Road tracks when they are in the application.
- Application type is a custom field used to categorize the various types of applications created. Although this field is not required, it is useful to categorize Application Forms if you plan to have different users manage different groups. For example, suppose one user handles only Graduate Applications. In that case, you can set up an Application Type of Graduate Program, and the value can then be used to customize Views for the appropriate users.
Note: The Application Type on the Application Form must match the Application Type on the Requirement Rule.
- Configuration will be populated after you have published an Application Form and will contain the 'code' used to build your application.
- Draft Configuration will be populated when you add components with the Form Builder tool. Once you Save and Publish an application, the 'code' moves to the Configuration section.
- Enable Payment After Submit will allow Applicants to submit their application and return later to submit payment.
- Enrollment Deposit Payment Connector is a lookup to Payment Connectors configured at your institution. Select the appropriate Connector for the payment of Enrollment Deposits.
- Enrollment Deposit Amount sets the amount an accepted applicant will need to pay for their deposit.
- Allow Deposit Mail-In Payment allows you to enable/disable the option to Mail-In a payment for Enrollment Deposits. If unchecked, applicants will NOT be able to select Pay by Mail when accepting your offer.
- Erase Hidden Fields allows the system to remove data if a field was visible to an applicant, they entered data, and then the field becomes invisible.
Note: Erase Hidden Fields will NOT delete child records that were created due to the card becoming visible but then changes to the app remove the card from view.
- For example, if you set up Conditional Visibility on a card such as 'Citizenship’= International will display a certain set of fields, and the applicant completes those fields but then changes the 'Citizenship' value, they may see a different set of fields. If Erase Hidden Fields is checked, the data on fields that become hidden will be deleted.
- Enabling this setting on a Parent form will NOT erase hidden fields on associated reusable forms; you must check the Erase Hidden Fields option for each reusable form separately.
Note: System deletion of data based on visibility conditions may lead to unexpected data removal for students completing multiple applications simultaneously.
- Reusable indicates if the Application Form should be available to other Application Forms.
- Recommendation indicates if the Application Form will be used to submit Recommendations. See Configuring Recommendation Letters for an Online Application.
- Org Wide Email allows you to specify the 'Organization-wide Email Address' used for email communications related to the Application Form.
Note: Org Wide Email is REQUIRED if you use the Recommendation feature.
- Owner will default from the user that creates the Application Form.
- Payment Connector is a lookup to Payment Connectors that have been configured at your institution. Select the appropriate Connector for the payment of Application Fees.
- Send After Submit, when CHECKED, will delay sending an email to Recommenders until AFTER the Application is submitted. If UNCHECKED, it will send an email when the applicant enters the Recommender email on the Application.
- Supplemental Subtext text will display beneath the Supplemental Headline.
- Supplemental Headline text will display below the Supplemental Button.
- Supplemental Button Text text will display on the button for completing Supplemental forms.
- Verification Page Content allows you to customize the text presented on the Verification Page with custom formatted text, clickable hyperlinks, and images, including hyperlinked images.
- Post Submission Page Content allows you to customize the text presented on the Post Submission Page with custom formatted text, clickable hyperlinks, and images, including hyperlinked images.
Previewing an Application Form
- Click on the Application Forms tab.
- Click the Application Form Name for the record you wish to preview.
- Click the Form Builder button.
- Click Preview from the top right of the form builder page.
- Select a test record from the list and preview your form. If no test records appear, please refer to the article Setting a Test Record to Preview an Application.
Note: The 'Test Record' must have an Application Stage = 'In Progress.'