Events Setup Guide
Introduction
In this article, you'll find a step-by-step guide for creating events. It will present you with thought-provoking questions to shape your event and offer guidance on selecting the appropriate settings. Additionally, you'll discover helpful links to supplementary resources for further information.
Entering the Basics
Begin by navigating to your Organization Events tab and click the New button.
1. Enter an Event Name and Description
Remember that registrants can see both the Event Name and Description.

2. Choose a Type and Category
If you're unsure which category or type to use, check internally to see how your organization uses these fields. These items help registrants find events on your site and can help with reporting later.

3. Enter an Owner and Calendar Color
These items are internal only and are not visible to registrants.
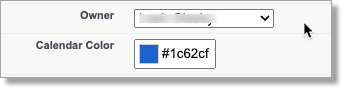
Before selecting a color, confirm with your organization that you don't need to use a specific color based on event type, owner, or other conventions.
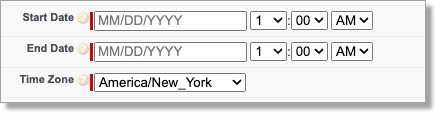
4. Enter a Start Time, End Time, and Time Zone
5. Save your Event
After saving the basic details, take a look at the different event options provided below. Each question/table will inquire about your event and help you navigate through the preferences you need to fill out.
Configuring Event Preferences
The Event Preferences section allows you to define additional details about your event. Follow the prompts below to get started. You can view a complete list of preferences and descriptions in the Understanding Event Details article.
| Are you using FormAssembly or TX Forms for event registration? (Not sure? Check internally to confirm.) | |
|---|---|
|
Form Assembly |
TX Forms |
| Is there a specific registration form for this event? For details, see Events Forms. | Is there a specific registration form for this event? For details, see Events Forms. |
|
Note: whether using FormAssembly or TX Forms, your default Event Form Type and Default form are set under Event(s) Settings. |
| Is this a recurring event or a one-time event? | |
|---|---|
|
Recurring Event |
One-Time Event |
| Select the Recurring Event checkbox. | Set the Date and Time for your event. |
| Is this session part of a parent event? | |
|---|---|
|
Yes |
No |
|
You'll need to set up your sub-event!
Note: If you include a charge, be advised that you cannot enable a Waiting list.
|
Leave the Primary Event field empty. |
| Do you have a limit on the number of attendees that can register (including guests or the number of guests)? | |
|---|---|
|
Yes |
No |
|
Uncheck the Unlimited Attendees(1) field and set your Max Attendees(2) at the limit (including registrants and guests):
|
Make sure the Unlimited Attendees field is checked. If the Unlimited Attendees field is checked, the number in the Max Attendees field is ignored:
|


|
Associate your Sub-event with the appropriate Parent event: |
|---|
|
Now you'll need to associate your Sub-event to the appropriate Parent event using the Parent Event lookup field:
|
| Ensure the Sub-event is set to Public to ensure your registrants can see it when they sign up. |

| Do you plan to open registration as soon as the event is advertised? | |
|---|---|
|
Yes |
No |
|
Leave the Registration Open Date blank. The event will be available for registration as soon as it is published:
|
Us the Registration Open Date setting to specify when registration will become available. If contacts attempt to register before the event opens, they see a message indicating that registration is unavailable:
|


| Is there a deadline by which registration for the event is required? | |
|---|---|
|
Yes |
No |
|
Update the Registration Deadline Days setting by selecting the number of days before the event registration is required:
|
Ensure the Registration Deadline Days setting is set to ZERO, as this allows registrations sup until the event ends:
|


| Do you plan to provide your registrants with QR codes to expedite check-in? | |
|---|---|
|
Yes |
No |
|
Use the QR Check-in Hours Before Event setting to determine how many hours before the event your registrant can check in with the OR code provided. Then, use the QR Check-in Hours After Event setting to determine how many hours after the event your registrant can check in with the OR code provided.
|
Ensure you have a check-in plan on event day, even without using QR codes. |

| Do you want to associate a location with this event? | |
|---|---|
|
Yes |
No |
|
Location Lookup: With this option, your registrants are provided the location as a link that can take them directly to a Google Map pin of your event location.
Location Picklist: With this option, your registrants are provided a text name of the location, but there is no interactivity.
Note: If you use TargetX Insights, you must use Location Lookups.
|
|


| Do you plan to sync these events to your Institutional Outlook or Google Calendar? | |
|---|---|
|
Yes |
No |
|
Ensure that the Copy to SF Calendar and Copy Edits to SF Calendar fields are checked:
|
Ensure that you've left the Copy to SF Calendar and Copy Edits to SF Calendar fields are unchecked:
|


|
Are there Keywords you'd like to associate to this Event?
|
|
|---|---|
|
Yes |
No |
|
Using the Events Keywords multi-select picklist, add all desired keywords using the arrow buttons:
|
Make sure that no Events Keywords have been selected:
|


| Are you using Recommended Events? | |||
|---|---|---|---|
|
Yes |
No |
||
| Do you want to prevent event recommendations from appearing after the contact completes registration for this event? | Save your event and continue to Email Preferences. | ||
| Yes | No | ||
|
Check the Ignore Recommended Events checkbox. This means the contact doesn't see recommended events after registrations have been complete:
Save your event and continue to Email Preferences. |
Keep the Ignore Recommended Events checkbox unchecked. This means that after registration is complete, the contact sees Recommended Events:
Save your event and continue to Email Preferences. |
||


Setting your Email Preferences
Select the Email Templates you want to use for each of the options under Email Messages:

Creating Custom Questions
Custom questions are recorded on each individual's registration record and are unique to this event:

For more information on creating and managing Custom Questions, see Managing Custom Questions.
Branding your Events
The final step in creating your event involves deciding if you want to have a background image on the registration page. For details on configuring your Event images, see Adding Images to your Events.